Gams

Tuesday, March 27, 2012

What's Cookin'?

If you've visited my blog at all in the past (which I assume you probably have, because you're here now!), you know that I pretty much love anything and everything from Doodlebug Designs!  They recently posted a new sketch challenge on their blog for March so of course, I had to join in the fun.  It was a good motivator for me to use up some of my 'old' Doodlebug stash, to make room for all of the fun new things they have coming out from winter CHA (shhhhh -- don't tell my hubby I'm already planning on buying more! ;)).  Here's a look at the sketch:


<>For my take on it, I pulled out various items from Doodlebug's Bon Apetite line as well as, some of my other Doodlebug tried and true favorites!  I had purchased the Bon Apetite pieces awhile back, with these particular photos in mind, but had never gotten around to putting the actual page together.  How cute is my little cook?  Whatever he's cookin', I'll take seconds!
Supplies used:  Cardstock: Bazzill (DB Candy Apple),  Patterned Paper: Doodlebug 'Apron Strings' and the mini tone on tone heart paper  is the 'B side' from the Sweet Cakes collection,  Embellishments: Doodlebug Bon Appetit Icons cardstock stickers and Cute Cut diecuts,  Doodlebug boutique button, baker's twine and sequins, Tim Holz mini attacher, Other: computer font, machine stitching, Stampin Up scallop punch, October Afternoon Sprinklers (color - Paper Doily) and Letter Stickers (Boarding Pass collection)
 
The stickers that coordinate with this line were so cute, I couldn't resist using a bunch of them.  In order to use several and not detract from the pictures, I clustered and layered the stickers on a couple different spots throughout the page.  I even lifted a few of them up, with dimensional adhesive to create a more realistic look.  A grouping of the dishes above this 'free dish washing ticket' creates a fun little scene, don't you think?


I layered a couple more of the stickers over top of one of the tags from the diecut sheet, strung it all on some baker's twine and hung the twine from a button, I had secured to the page.  The journaling was actually printed on the backside of one of the diecuts from the 'cute cut' sheets.  I loved the shape of this particular diecut, but it was oriented with lines to be journaled on vertically.  So, I made it work for my page by printing my text on the white (back) side and stitching around the edge, for some added interest.


Thanks so much for stopping by!


Thursday, March 15, 2012

This and That

Each year, as my boys turn another year older, I try to put together a page highlighting a favorite photo of them at that age and what they are currently into and/or doing (favorite shows, toys, friends, likes, habits, etc).  When I saw Echo Park's new 'This & That, Charming' collection I knew it would be the perfect palette for this page in their yearbooks. 

The color story from this line is one of my favorites.  I love the combo of teal, green, black, yellow and how it's complimented by the woodgrain.  It provides such a great starting point for boy photos.  The first of the pages I put together was for TJ -- documenting him at six years old.  As you'll see, I enjoyed using and layering lots of the stickers from this line and couldn't get enough of the decorative brads, as well.

Supplies used:  Paper: Echo Park This & That Charming: Dots & Plaid, Border Strips, Green/Cream Solid, Vintage Fans Cardstock: Bazzill Stickers: Echo Park This & That Charming Element StickersEmbellishments: Echo Park This & That Charming decorative brad Other: computer font, MME baker's twine, Stampin' Up notch punch, foam adhesive

The globe sticker was a favorite of mine.  I was certain to include it on TJ's page because he is so into maps, wanting to know about other countries and just an 'explorer' in all sense of the word!!  So, I thought it was the perfect accessory to a page of him at this age!


Did I mention that I liked the decorative brads?!  Again the globe one was a favorite!  I think I squeezed seven of them on this one page.


Now it's Justin's turn.  I had more than one photo that I wanted to use on his page, and the filmstrip sticker strip proved to be the perfect way to add them onto this page.  I simply sized down the photos to fit inside the filmstrip frames, before printing them.  


Supplies used: Paper: Echo Park This & That Charming: Border Strips, Green/Cream Solid Cardstock: Bazzill Stickers: Echo Park This & That Charming Element Stickers Embellishments: Echo Park This & That Charming decorative brads, My Mind's Eye Miss Caroline Fiddlesticks "Lucky" twine, My Mind's Eye Fiddlesticks "Love" pin Other: machine stitching, computer font, foam adhesive, black ink pad, Technique Tuesday Ali Edwards stamps

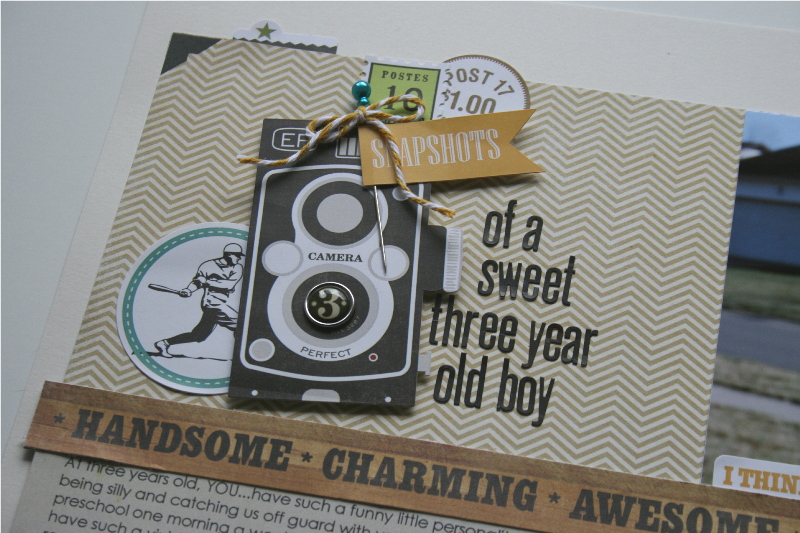
After starting with that cute filmstrip, I decided to continue with the photography theme of the page and built my title element on top of that darling vintage camera image and cute little banner with the word 'snapshots'.  I added the 'three' brad onto the camera lens, as that's Justin's age and dressed up the banner with a stick pin and baker's twine.


Again, more vintage cameras -- with the use of one of the paper borders.  I also pulled out my Technique Tuesday Ali Edwards, 'Life in Pictures' stamp set because it perfectly complimented this page.  I used the filmstrip, photo corner and this darling phrase, from the set.


I even put together this quick card with some of my leftover pieces.


I have quite a mess to clean up in my scrapbook space, with all of the projects I've been putting together.  So, I'm off to clean that.  I'll be back soon with more to share.  As always, thanks for stopping by!  I love to hear your comments -- so thanks so much to those who do!

Saturday, March 10, 2012

Baby Girl

My sweet little girl will be turning 4 months old in just a matter of days.  Time certainly flies by with the third one!  Somehow, despite the chaos of everyday life, I've managed to make quite a bit of progress in her scrapbook, thus far.  It certainly helps to have design team assignments and fun new products at my fingertips, to encourage me to stay up until the wee hours of the morning and scrapbook!

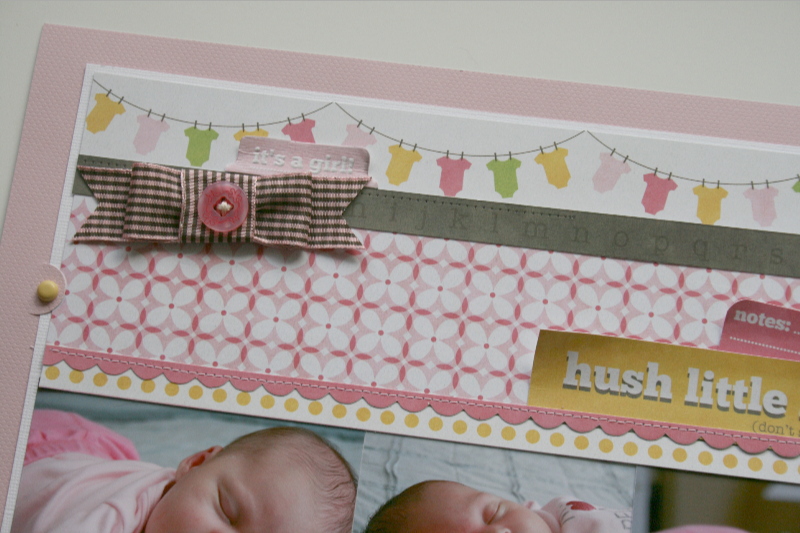
Shortly after this little bundle was born, I was thrilled to find the opportunity to eek out some time to make up a simple birth announcement for her.  I saved one to include in her scrapbook (of course!) and thought it would be fun to pair that with some of the photos I took of her, as I attempted to capture the 'perfect shot' for her announcement.  I used We R Memory Keepers newest release, Baby Mine.


Supplies used: Paper: We R Memory Keepers Baby Mine collection: Sweetie Pie, Sugar & Spice, Baby Pink Cardstock: We R Memory Keepers Baby Mine Light Pink and Baby Mine Pink, Bazzill White Embellishments: We R Memory Keepers Girl Crochet Doily Frame, and It's a Girl diecut tag, Crate Paper 'Random' buttons, My Mind's Eye Lost & Found buttons, Doodlebug Boutique buttons and brad Other: machine stitching, computer font, photo corners, alpha rubons, ribbon

Here's a closer look at the first of the two pages, that features the actual announcement.  The stork image is from the Lawn Fawn 'Plus One' stamp set and baker's twine is Doodlebug.


That sweet little pink crocheted frame is part of the Baby Mine collection.  I thought it perfectly highlighted those cute little baby feet that I cut from one of the patterned papers.


This page shows some of the sweet 'outtakes' from our little photo shoot.


And some of the details:


As I've done with my boys, I'm hoping to do a monthly review page for the first twelve months of baby girl's life.  I had the opportunity to use Pebbles Country Picnic collection.  As soon as I saw the colorful floral paper from this line, I immediately thought of the large picture of Emerson smiling and how well the colors in her shirt coordinated with this paper.  So, it seemed an obvious choice to use this picture as the focal shot, and some others highlighting her second month of life.


Supplies used: Paper: Pebbles Country Picnic collection: Secret Garden, Vineyard, Patio Cardstock: Bazzill Stickers: Pebbles Country Picnic collection dimensional stickersEmbellishments: Prima flowers – Gillian Cider Other: Tsukineko sparkle shimmer spritz (on vellum circle), computer font, machine stitching, embroidery floss, ribbon, scallop border punch, butterfly punch, photo corners, chipboard number (title), vellum, Technique Tuesday stamp, black embossing powder

 Here's a closer look at the picture that inspired this page:


I used one of my favorite Martha Stewart punches for the sweet little green butterflies that accompany the dimensional stickers from this collection.  In addition, I love the detail and texture that prima flower adds to the center of the ribbon bow.


And page two:


It's hard to tell from this photo, but I spritzed the title circle with shimmer spritz for added interest and 'girliness'.  The journaling runs along the right vertical edge of the second page.


Thanks so much for stopping by!  I've been papercrafting quite a bit, so I'll be back soon with more fun projects to share!

Wednesday, March 7, 2012

Simple Stories

I saw that the Simple Stories brand had put out a call, looking for new designers for their design team.  Since I had completed a couple of pages with their "100 days of Summer" collection and had purchased pieces from their baby and birthday lines, I thought I might as well throw my name in the hat.  If nothing else, it was a good motivator to get some more pages done and use up some of the product I already had purchased.  What I love about the Simple Stories products is that they provide a solution for every scrapbooker - from simple to decorative. Their products can be a time saver, by easily being cut apart and slipped into pre-sized divided page protectors.  Thus they are ideal for those that want and need to document their memories quickly. At the same time, however, each collection is equally as inspiring for more creative play and detailed pages, which is, how I've chose to use them so far. I didn't get chosen for the team, but I'm so glad it encouraged me to get some more photos/memories scrapped, and I and my kiddos really love how the pages turned out -- so that's a bonus!

Here is the page I completed last fall, using Simple Stories '100 Days of Summer' line, as an assignment for Simply Scrapbooks.  The colors and icons in this line really lend themselves to so many of summers great memories.  On this page, I used pictures that were taken at a local festival that we take the kids to every year.


The Simple Stories 'Happy Day' birthday line definitely tops my favorites of their collections.  I love that the colors work for either girl or boy and the different icons and patterns are just so cute.  This page highlights pictures from Justin's 3rd birthday. 


And a couple of close ups:


With a new baby in the house, I easily gravitated toward the Baby Steps collection.  I was especially fond of this patchwork style paper, that included many of the designs from this line, to use for the page background.  I LOVE this picture of baby girl and I from the hospital.  I simply can't believe that those newborn days are already gone!


Here's a look at the title.  I cut the letters B A B Y from one of the 12x12 sheets, for my title.


Of course, I couldn't call the page complete without adding a few buttons, some machine stitching and a little baker's twine!


And finally, I used up some of my scraps from the 'Happy Day' collection to whip up a quick birthday card.


I'll be back to share a couple more Simple Stories pages in the coming week, as I just picked up some of their new 'Awesome' collection released at CHA.  Can't wait to play with this one!


Awesome_cover

Sunday, March 4, 2012

Project Life January 2012

I mentioned back at the start of the year, that I was back on the Project Life bandwagon, after a brief hiatus during 2011.  To read more about the monthly approach I'm using go here.  Since I'm not doing a photo-a-day or even a weekly glance, I've decided to gather all of my pictures, notes and memorabilia at the end of the month to lay out and fit within the Design A pages (yes, I was one of the lucky ones that snuck in an order of these before they were quickly sold out AGAIN!).  While I didn't use any of the alternate page protector styles this month, I plan to work them in, in future months. 

Are you ready for some photos?  There are certainly quite a few, as I attempted to capture an overview of the month and details of each page.  Here's a look at the first spread in my Project Life album:


As you can see, I primarily stuck to the supplies provided in the Clementine core kit, but added some additional stickers and/or embellishments and stamping here and there.  I am loving dipping into my stash of Technique Tuesday Ali Edwards stamps for this project.  I first started off the month with hand journaling -- but the perfectionist in me was not pleased with the results.  So, I went back to the computer to type up most of my text, but plan to mix the two styles throughout my album.  This first page is pretty standard.  I did add a couple of label stickers from Jillibean Soup and My Mind's Eye, some stitching, an AE stamped phrase, and combined two photos on one 4x6 canvas in the lower right corner.


Since my birthday was this month, I decided to include multiple photos from that day.  I cut a Design A page protector in half to house and highlight these photos and memories.  Looking back, I think I will add some sort of tab on the edge of this page, so that the back side of it doesn't get lost when looking at the album.


Here is the backside of that 'half' page.  It includes a close up shot from a recent scrapbook page and also a picture of a pile of clothes that I scored for baby girl at Gymboree for just $25!!!  Who doesn't love a good deal?!  I kept the receipt for the purchase and stapled it inside the folded journaling card.  I used one of the arrow stickers, included in the core kit, to denote that journaling card could be opened to reveal more.  I also kept one of the clothing item tags, to show how deeply discounted some of my purchase were, and sewed that directly to the photo.


On this page, since I mixed up the placement of some of the photos and text, I used the round number stickers to easily match up the journaling cards with the proper photos.  Not too much 'extra' going on, on this page except for a punched and stitched heart and some stamping.


Here's a view of the next full page spread for January:


I snapped a photo of the ingredients for one of my favorite Weight Watcher's meals and typed up the recipe to include next to it.  I used a fiskars stamp set that I've had in my stash for awhile to dress up my 'recipe card' a bit.  Love that picture of Justin and his crazy bedhead -- I stamped a Technique Tuesday stamp directly on that picture and embossed it with white embossing powder.  I also included a photo from my new instax camera to this page.  I simply taped it to one of the plain 3x4 grid cards with K&Company smash tape and slipped it right into one of the small slots.  The bottom half of the page includes a random photo of the boys playing during the week (and Justin's cute little plumber crack hanging out!) and a conversation between the two boys that I had jotted down and later typed on one of the folded journaling cards.  Again, I simply added a bit of smash tape to that card and slipped it into the page protector.


Just as I did with the last spread, I cut a Design A page protector in half for the next set of photos and memories.


And here is the back side of that half page.  Since I wanted to use a small 3x4 photo in the 4x6 slot at the bottom and include the journaling on a card right next to it, I simply used a zig zag stitch to join the two so they wouldn't move around and overlap each other once they were slipped into the page protector.


Here is the final page for the month of January.  Again, I included a (hilarious!) instax photo by taping it to a blank 3x4 grid card and using a zig zag stitch to attach that to the journaling card next to it, to fill in a 4x6 slot.  I also printed some smaller 3x4 photos to fill in the middle of the page and show a progression of Tom and the boys shooting off a rocket outside.  I added a few extra stickers and punches to round out the page.


So that's a look at our January.  Now that February is over I've gathered my pile of memorabilia, notes and list of pictures to get started on the next month of our life.  I'll be back to share that soon!


Monday, February 27, 2012

A boy's life

As you know if you've browsed my scrapbooks or looked through my blog any number of times, I'm a huge fan of Echo Park. So, it should come as no surprise that I snatched up some of their latest collection, A Boy's Life.  Afterall, there are plenty of photos and stories about boys to be documented, in this household.  I loved the somewhat muted color palette, fun icons and clever word stickers that it included. 

The first page, features some cherished photos of my oldest son and one of his Dad around the same age, both riding in a car from my husband's childhood.  I love the fact that my in laws have saved so many toys from that time.  They provide my kids with great entertainment, of course, but also a glimpse into their Dad's life around similar ages as themselves.

Supplies used:  Echo Park A Boy's Life patterned papers:  Energetic, Hot Rod, Imagination, Magnetic, Charmer, Element and Alpha stickers


Here's a peek at the journaling:


I've seen (and pinned!) this circle idea several times and couldn't wait for the opportunity to try it on a scrapbook page.  The Boy's Life collection was perfect for this technique because there were so many great papers in this line that I wanted to use.  Using a multitude of small circles to incorporate all of these papers, was a fun way to highlight the collection, but still keep emphasis on the pictures and the story!


I put together a second page, as well.  This photo just makes me giggle!  I turned around one morning to find our youngest son staring back at me with this face exclaiming, "Look mommy, I have a moustache!".  Love that boy and his goofiness.  He really knows how to turn on the charm and make me smile (especially when he's up to no good!).

Supplies: all patterned paper and stickers, Echo Park A Boy's Life collection (Energetic, Imagination, Charmer, Elements stickers and Alpha stickers), Doodlebug boutique buttons and twine


I can't resist some fun little banner stickers, and thought the upper right corner of the page was calling for a little bit of decoration.


And a look at the journaling and title.  I really liked the font style of the letter stickers that went with this line.  They were great for a big, bold title.  I'm sure I'll find myself sneaking them into another project very soon.


That's all I've got for today.  I'll be back soon to share the progress I've made on my Project Life album.  I've been sticking with the monthly approach and I really love it!

Friday, February 17, 2012

Sometimes calm, always crazy

Never did I imagine that I would have so many little boys in my life.  I've got two of my own, of course, and am now up to four additional nephews!  Growing up with an older brother provided me with a good look of what was to come, with all of these boys, though!  And don't be fooled, despite my girly appearance, I love the chaos and craziness that comes along with all of these little guys (most of the time, anyways!). 

With that in mind, it's no surprise that I had these pictures on my mind, to scrapbook -- my boys with two of their cousins on Christmas day.  Love that they are smiley and perfectly posed in one, and conjuring up their silliest faces in the next.  That's a pretty accurate portrayal of them, if I don't say so myself!  I decided to use these pictures along with some of my favorite My Mind's Eye 'Lime Twist' collection items and the latest sketch, from the My Mind's Eye blog.  Here's a look at the sketch from Anam Stubbington (with the theme "YOU"):


MME2012_sketch_layout02_Feb


And here is the page I put together:


Supplies used: MME Lime Twist, Fly a Kite "Spring" Zag paper (orange dot and chevron), MME Lime Twist, Fly a Kite "Everyday" Lines paper (blue/white star, diagonal stripe), Bazzill Cardstock, MME Lime Twist, Fly a Kite "Spring" and "Soar" Accessories sheet stickers, MME 12 days of Christmas trims (blue/white baker's twine), MME Lost and Found button collections - Rosy "Love" and Breeze "Boyish" buttons, Pink Paislee grid tape.

I really liked the photo and title placement from the sketch and used those as my starting off points.  I was particularly fond of the colors in the diagonal stripe paper and how well they seemed to scream "boy" and coordinate with the colors of the shirts they are all wearing.  I don't know if it's immediately obvious, but I designed each half of the page to coordinate with the mood of each picture.  Thus, the left hand side is linear, orderly and somewhat calm -- as are those sweet boys in the picture, while the right hand side of the page has lots of 'craziness' - skewed images, lots to look at and random little bits and pieces.

Here's a closer look at the title and journaling: 


And some of the sticker details in the top right corner:


This is certainly not your traditional Christmas page, but sometimes I think it's fun to highlight moments from an event on an entirely separate page.  Instead of having these darling photos get lost on a two page spread crammed with Christmas memories, I thought it would be fun to use them to document the relationship my boys have with their cousins. 

Thanks for taking a peek!