Gams

Monday, June 9, 2014

Jillibean Soup Guest Designer projects

If you haven't yet seen my prior post here, I was honored with title of 'Guest Designer' for the month of May for Jillibean Soup.  Since the remainder of my projects went live at the end of the month, I wanted to take the opportunity to share them here, as well. 

The following projects all feature Jillibean's newest Birthday collection 'Birthday Bisque'.  My motto is, you can never have enough birthday themed supplies - especially if they're Jillibean! ;).  This is one of my very favorite recent JBS collections and in turn, helped me produce some of my most favorite projects.  Let's start with the layout...


Supplies used: Jillibean Soup - Patterned Paper: Birthday Bisque/Bite Sized Bits, Cup of Candles; Spicy Social Soup/ Bite Size Bits; Soup Staples II/Yellow Salt; Homemade 6 Bean Soup/Navy Beans; Mini Placemats: Favorite; Peapod Parts: Birthday Bisque; Coordinating Label stickers: Birthday Bisque; Soup Labels: Birthday Bisque; Alphabeans: Mushroom Gray; Wood Sprinkles: Love; Stamps: Sweet & Sour Soup; Other - EK border punch, Veteran Typewriter font, Hero Arts black ink, foam adhesive, machine stitching, Silhouette.


The bite-sized bits paper was a favorite of mine.  I love all of the 3x4 cards and had trouble narrowing down which ones to use.  A quick grid design came to the rescue by allowing me to incorporate several of the cards alongside some mini placemats for an effective and colorful backdrop for my pictures and memories.

Next up was a birthday card.  I just loved this aqua and orange color combo, which included a pop of red.  Again, I used one of my favorites of the mini placemats, to work my design around.  Even with the addition of the mini heart, I think this card could work for either a male or female recipient.


Supplies used: Jillibean Soup - Patterened Paper: Birthday Bisque/Cup of Candles; Cold Avocado Soup/Ripe Avocados; Mini Placemats: Favorite; Peapod Parts: Birthday Bisque; Coordinating Label stickers: Birthday Bisque; Soup Labels: Birthday Bisque; Other - Lawn Fawn sequins, American Crafts twine, Doodlebug gems, vellum, foam adhesive.
The focus of this last card, is again a piece trimmed from the bite-sized bits patterned paper.  This time, I trimmed the card into a tag shape, punching holes at the top and threading on twine for added dimension.  It looks so cute 'adhered' to the card base with that mini colorful clothespin, don't you think?!


Supplies used: Jillibean Soup - Patterned Paper: Birthday Bisque/Bite Sized Bits, Pound of Party, Pint of Presents; Cold Avocado Soup/Ripe Avocados; Coordinating Label stickers: Birthday Bisque; Soup Labels: Birthday Bisque; Wood Sprinkles: Love; Other - Stampin Up scallop border punch, Studio Calico sequins, Pebbles clothespin, American Crafts twine, Doodlebug enamel dots, machine stitching, foam adhesive.

You can get another look at these projects over on the Jillibean Soup blog.

Happy Monday, friends!

Monday, May 26, 2014

Lots of washi

Happy Monday and Memorial Day to my US friends!  I'm spending most of the day enjoying my family but wanted to pop in quickly to share and link you up to a few recent projects that I've had featured on the Love My Tapes blog. 

First is a sweet little tin, that I altered, to hold the bows and barrettes I continue to gather for my little girl's hair.  This piece serves not only as functional organizational container, but also as a cute décor piece to add to her room.

 
For the full details and step by step tutorial to make your own, hop on over to this post on the Love My Tapes blog.
 
Next up is a pair of sweet and simple cards that would be just perfect to hand off on Father's Day, to all of the special Dads in your life. 


Who knew washi tape neck and bow ties could be so cute!  Again, hop on over to this post on the Love My Tapes blog for full directions and a step by step photo tutorial to create your own.
 
Thanks for joining me today!  See you real soon with lots more to share!


Wednesday, May 14, 2014

Guest Designer and some news!

Hello there, crafty friends!  So sorry for my unexplained absence!  While I didn't intend to take such a long blog break -- as usual life got in the way!  More specifically, I've been focusing a little more on ME! Try to get my health in check, make exercise a priority and fortunately, I've been having GREAT results!  Yay!  That downside to that is though, rather than heading to my scrapbook desk in the evenings, I've been heading to bed early to catch some extra zzzz's and keep myself from any late night snacking while I scrap - lol!  Hopefully now that I'm three months into these healthier routines, the bad habits are kicked and I'll be around sharing things with you all more often.

Even though I haven't been posting, I've still been busy crafting.  In fact, I have some especially fun things to share today, that I've been keeping under wraps.

First off, is a Guest Designer stint that I was fortunate to land with Jillibean Soup.  I was sent a generous supply of items from the Sightseeing Stew and Birthday Bisque collections. 

Today on the Jillibean blog, my projects featuring Jillibean's wonderful new travel line are being shared.  The first thing I was itching to create with this collection was a scrapbook page with pictures and memories from our Summer trip to Seattle.


Supplies used: Jillibean Soup - Patterned Paper: Sightseeing Stew/Bite Sized Bits, Tossed Tickets, Blanched Bags, Poached Photos; Soup Staples II/Gray Salt; Peapod Parts: Sightseeing Stew; Coordinating Label Stickers: Sightseeing Stew; Soup Labels: Sightseeing Stew; Wooden Nickels: Birthday; Other: American Crafts cardstock, Doodlebug sprinkles, foam adhesive, Veteran Typewriter font, machine stitching
One of my favorite pieces from the entire Sightseeing Stew line was the 'Tossed Tickets' patterned paper.  Upon first look, I knew I wanted to cut the paper up, punch holes in the tops and thread string through the 'tickets' to create a fun, textural cluster on my page.


These cute labels were cut from the Bite Sized Bits paper and were the perfect home for my journaling.

 
An additional piece from the Bite Sized Bits paper, allowed for an quick short-cut to my title, and was easily embellished with a cute airplane diecut and wooden nickel button.


I couldn't stop with just the scrapbook page, and went on to create too additional cards.  This first card uses one of the Jillibean placemats (kraft circles) to highlight a variety of the patterns from the collection.


Jillibean Soup supplies used: Patterned Paper: Sightseeing Stew/Bite Sized Bits, Pickled Planes, Blanched Bags, Tossed Tickets; Soup Staples II/Yellow Salt, Gray Salt; Placemats: Kraft Simple Circles; Mini Placemats: Smile; Peapod Parts: Sightseeing Stew; Coordinating Label Stickers: Sightseeing Stew; Wood Sprinkles: Love; Other: machine stitching, foam adhesive
As you may have noticied the Peapod Parts are some of my favorite Jillibean items.  I seem to sneak them in to most of my recent projects!  The sweet little globe from Sightseeing Stew inspired the whole concept for this miss you card.


Jillibean Soup supplies used: Patterned Paper: Sightseeing Stew/Bite Sized Bits, Tossed Tickets, Blanched Bags; Homemade 6 Bean Soup/Navy Bean; Peapod Parts: Sightseeing Stew; Coordinating Label Stickers: Sightseeing Stew; Wise Words: White Sentiments; Cool Beans: Christmas; Other: Studio Calico wood veneer stars, American Crafts twine
The remainder of my guest designer projects will be highlighted on the blog next week, so I hope you'll come back to see them the (there might just be a little giveaway to go along with the post - hint, hint!!!).  They are some of my new favorite creations!

Oh, and did I mention some news?!  If you've been here before, you may have noticed that I added a new badge to my blog along the right hand side.  I'm happy to share that I've been selected to join the designers over at the newly re-launched Love My Tapes.


I shared a peek on instagram, at the LMT products that I'll be working with and will be back soon to show you how I've been putting all of that pretty tape to good use!

Thanks for stopping by and sharing in my excitement!

Sunday, February 16, 2014

Another quick Jillibean Soup card


Hi blog friends!  I am back again with a quick post today, to share another card I whipped up for the challenges posted on the Jillibean blog this weekend.  If you missed my first card post yesterday, you can find it here.

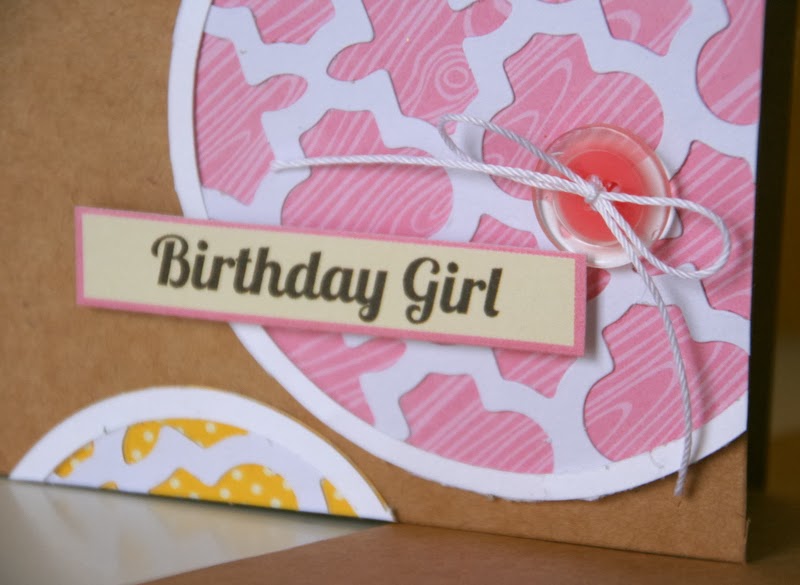
This time the challenge was to use Jillibean's placemats in a layout, card or project.  By the looks of this card, you might think I had enlisted the help of a fancy diecutting machine, but that is the beauty of the Jillibean placemats. That fancy lattice work is actually a premade 12x12 piece of diecut paper - the 'placemat'.  I cut it down to fit inside my white cardstock rings and then backed it all with different patterned papers. 


Supplies used: Jillibean Soup - placemats, patterned paper, buttons, soup label sticker; Other: kraft card and enevelope, crochet thread, tombow mono adhesive.
I cut off the ends of a soup label sticker, to better fit my card.  The addition of a Jillibean button tied with string adds just enough extra pop to draw your eye to the card's sentiment.

 
And a few more buttons ... just because I can't help myself and they are so darn cute!


Enjoy the rest of your weekend and come back and visit me again soon!

Saturday, February 15, 2014

Quick thank you card

Happy Saturday!  We've had a busy day of shoveling, playing in the snow and kid's sports.  Somehow, I still managed to sneak in a little time to play along with one of the challenges on the Jillibean blog, though (and hope to keep working on them, when my littles are tucked into bed for the night!  Soon, soon!).
 
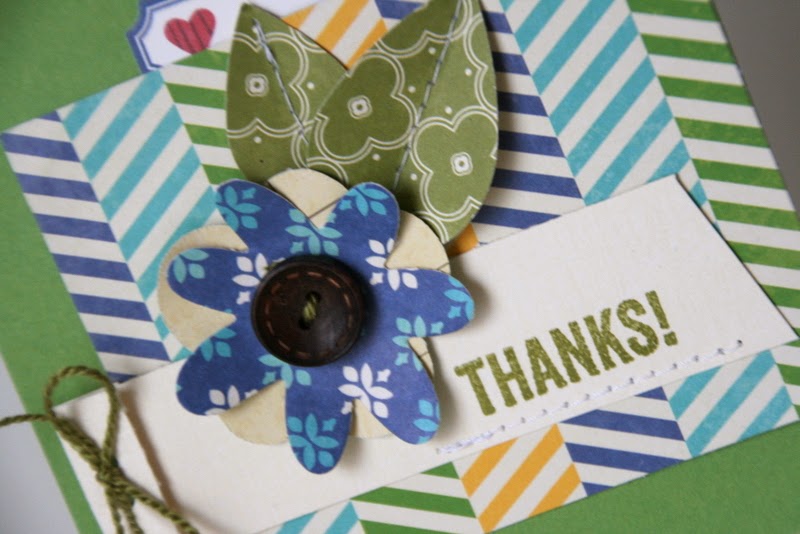
I derived inspiration for the layout of this card from sketch #1 that was posted on the blog on Friday.  I dug into my latest Jillibean favorite, Cold Avocado Soup, to whip together this quick card for a special friend!


Supplies used: Jillibean Soup - patterned paper, button, label sticker, stamped sentiment; Doodlebug - flower dies, enamel dots; Studio Calico - sequin; Stampin Up - ink, splatter stamp; Fiskars - punch; American Crafts - cardstock.

That sweet stamped sentiment is a Jillibean stamp from the Cold Avocado line.  I love the type-set and it stamps great with my small stash of Stampin' Up inks.


In the sketch there was a place for splatters along the top of the card.  I used a Stampin' Up stamp and ink to achieve the same look.  So, yeah, those are fake splatters!  You'd never know unless I told you, huh?  I love that the stamp allows you to have 'controlled' misting!  That's just perfect for my OCD-self! Ha!

 
Thanks for visiting today!  Hope you're stealing away some crafty time this weekend, too.

Wednesday, February 12, 2014

Channeling the summer heat

At this point in the season, I know I'm not the only one wishing for warmer weather and dreaming of sandy beaches, the sound of waves crashing and a pina colada in my hand, right?  The brutally cold temperatures we've been having, have me looking back through our summertime pictures to remember what it feels like to be outside in the warm air and sunshine! I fear I might have forgotten! And since, of course, I'm not caught up on printing and scrapping most of those pictures - now seems like the perfect time.  If nothing else, my mind will be in a warmer place than my body! Ha!

At the start of last summer, my kids and I sat down and created a 'summer bucket list'.  It included all the activities we hoped to participate in and things we wanted to accomplish.  By summer's end we still had a few items left on our to-do list that we wanted to squeeze in.  One was a bike ride on the local bike trail.  I had several pictures from this day, so they necessitated a two page spread.


Out for publication!  Be back soon!

I went through my stash of Jillibean products for this page.  Other than the oh-so-perfect bicycle patterned paper, I knew there were several other elements that I could mix and match to achieve a bright, summery look.  This sweet bicycle diecut from the pea pod part package, just HAD to be included.  I accented it with some diecut clouds and a fun little flag that looks as if it's carried along by the bicycle.

 
To tie in the second side of the page, I continued the journaling again accenting it with some favorite Jillibean diecut pieces.  I loved the cloud shapes in the pea pod parts so much that I ended up tracing them onto several other blue colored patterned papers, and cutting them out to use as additional accents.  A few additional embellishments, including the button and camera clip add interest and draw your eye throughout the page and pictures.


I hope this post finds you enjoying warmer weather than I, and if not, we can dream of the heat together as we scrap our summer memories, huh?  Desperate times call for desperate measures! LOL!

See you soon!

Tuesday, February 4, 2014

Themed pages and products

It's always fun to get extra creative with your scrapbook supplies and use them for a purpose other than what they were intended.  I often find the creative challenge of that to be stimulating and fun.  But at the same time, sometimes it works to go by the ole phrase, 'if it ain't broke, don't fix it'.  And the latter are just the type of projects I will be sharing with you today. 

I've never made it a secret of my love for the cute and bright designs that Doodlebug produces. They make some of the cutest theme-y papers and products in the industry. I dug into my stash of one of their older Christmas collections to pull together a festive page of my kiddos visiting Santa back in 2012.

Supplies used: Doodlebug Designs - cardstock (background), patterned papers, buttons, gems, 3 dimensional sticker; Bazzill - embossed cardstock (white); Elle's Studio - label; Studio Calico - sequins; Technique Tuesday - stamp (phrase); Stampin Up - ink; other: machine stitching, Veteran Typewriter font (journaling), Marmaletta font (title)
Since I went so 'literal' with the supplies and theme of the page, I challenged myself to get creative with the journaling.  Instead of telling the story from my perspective, I chose to write a letter to Santa in the voice of my children.  It was fun to document the memory from what I imagined would have been their perspective and gives the page a little more depth and meaning than the typical who, what, when where, why summary.

 
This next page uses many pieces from Doodlebug's recent fall themed 'Happy Harvest' collection.  The colors and theme were the perfect compliment to these joyful photos of my three frolicking in the fall leaves. 

Supplies used: American Crafts - cardstock (background); Bazzill - cardstock (red); Doodlebug Designs - patterned paper, sprinkles, twine, letter stickers, 4x6 album insert cards; Simon Says Stamp - heart die; My Mind's Eye - enamel dots; Other: foam adhesive, machine stitching; Veteran Typewriter font (journaling)
Again, to mix up the predictably of using a themed collection for it's intended theme, I got creative with the patterned paper.  Rather than use the paper in strips, squares or large pieces I chose to cut in in the shape of leaves (hand drawn) and scatter them down the right side of the page as if they were falling.
 
 
I hope these pages show you that even if you stick to the predictability of a themed product, there are plenty of other ways to infuse your own creativity into your design and journaling! 
 
Thanks for stopping by to visit me today!