Gams

Showing posts with label Just Nick cut file. Show all posts

Monday, February 15, 2016

Ten: A Just Nick Layout

Good Monday morning!  I'm excited to get this week started because I've got a week's worth of projects to share with you! So, make sure you stop back by each weekday to see what's new.
 
Over the weekend I shared a project for the Just Nick Studio / Clique Kits blog hop.  If you missed that post and page, and the details of how to enter the giveaway, you can find it here.  I had so much fun pairing the kit contents and exclusive cut files that I couldn't stop creating and combining the two!  So, I'm sharing another page that resulted from this team up on the Just Nick blog and here, today.
 
 
CK_Feb16-CutFiles2
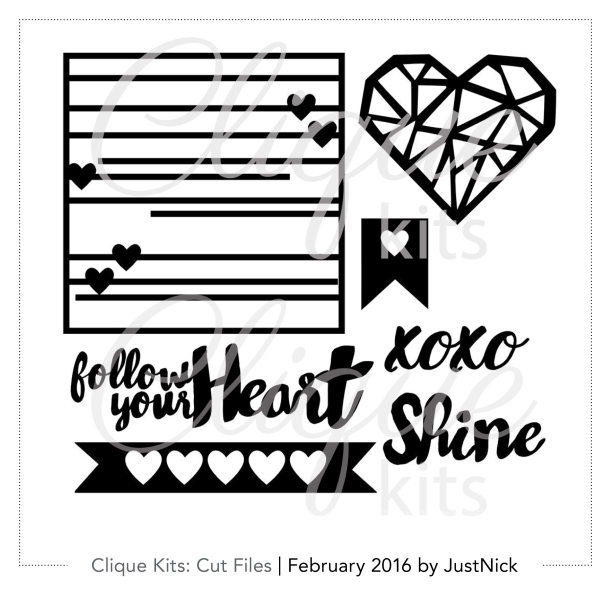
I used the bannered heart design, from the exclusive set of cut files, to cover the majority of the background.  I chose to forgo the banner style ends, and instead cut them off for a clean and straight edge.  The resulting cuts were sized at approximately 7.75"x1.5".  I cut five of them, from white cardstock, to fill my background.  Layering them atop of one another and under my picture creates cohesion throughout the design.


The open hearts were a great place to introduce lots of color and pattern from the kit papers into my design.  I even used the included sequin mix to back some of my hearts and add a little extra detail and shimmer. 

Some foam mounted stickers, stictching and a Thicker title were the finishing touches atop my background design.


The combination of the Hot Mess kit and Just Nick designs is a pretty perfect pairing, wouldn't you agree?  The are both so full of product, design and versatility, that I've got one more page combining the two that I will share with you later in the month.
 
I hope to see you back here tomorrow as I start to share the projects I've made with My Creative Scrapbook's February Main kit!

Saturday, February 13, 2016

Just Nick/Clique Kits blog hop

Happy Saturday!  Today I'm participating in a fun blog hop between Just Nick Studios and Clique Kits kit club.  If you are following along the hop, you should have landed here from Carolina Schulz's blog.   A $25.00 gift certificate to the clique kits shop will be awarded to one person who comments along the hop.  So, make sure to keep hopping and leave comments to be entered to win!

 
If it's your first time joining me on my blog - welcome, I'm so happy to have you here!  I had so much fun combining the Clique kits Hot Mess kit and exclusive Just Nick files and I'm excited to share the results with you...


The lined heart filled square file was my favorite, of the exclusive designs.  I knew at first glance that it would make the perfect 'memo board' background for my page. The original design was square, but by using the erase and weld functions in the silhouette software, I was able to join two squares atop of one another resulting in a taller design and more surface to my 'memo board'.
 
All of the Maggie Holmes Shine collection ephemera and stickers, included in the Clique Kit were a great companion to this idea and design.  They allowed me to create a pretty collage of elements that I clipped to my background and used to accent my pictures.
 

The wood veneer heart outline, just so happened to fit perfectly atop of one of the diecut hearts, and the various heart stickers included in the kit were a fun and complementary accent.
 

Tags are a natural element on any memo board, and there were certainly many to choose from in this kit.  I also loved that I could clip a couple of the transparent diecut tabs onto the horizontal lines of my diecut background.
 
 
The combination of this kit and the coordinating cut files are a perfect match, wouldn't you agree?  In fact, I've had so much fun with this pairing that I've made two more pages that I'll be sharing on my blog in the coming weeks.  I hope you'll stop back by to see them!
 
Thanks so much for joining me and letting me share my project with you today! Don't forget that A $25.00 gift certificate to the clique kits shop will be awarded to one person who comments along the way.
 
Your next stop on the hop is Aliza Deutsch, so click on over to see what wonderful things she has in store!


Monday, January 4, 2016

Design Team News and a Sneak!


Happy New Year!  I am excited to be ringing in 2016 with a fun little announcement - I have been asked to continue my term with the Just Nick design team!
 
As you can see there is loads of talent on the 2016 team and Nicole's got some fun and exciting things planned for Just Nick in the new year.
 
My design team intro (or should I call it 'refresher') is up on the blog today.  We were also tasked with the assignment to create and all about me page.  I went to work with the capture this and basic hearts cut files along with some Simple Stories I AM collection products to put together my page. 
 
Here is a peek at the page....


I hope you'll head over to the Just Nick blog to see the rest!


Monday, December 28, 2015

This Is 2015: A Just Nick DT page

Hello blog friends!  All this week on the Just Nick blog, we're focusing on remembering and reflecting.  In doing so, I have been flipping through the photos on my phone from the past year.   I uncovered so many gems that had not yet been printed, soI decided to make a page featuring some of the highlights of our year. This page will serve as the title page for my 2015 family album. 


Supplis used: Simple Stories - patterned paper, bradz, stickers, diecuts; Fancy Pants - buttons; Tim Holtz - mini attacher; Bazzill - cardstock;  Other: foam adhesive, machine stitching


I used three different files from the Just Nick store to create and customize my design. 

The 'This Is' portion of my title was taken from the Arrow Set 1 cut file. The original arrow design used in this file was much thicker and shorter.  However, I wanted to use a longer, thinner title that would stretch the width of my page and not get lost in my grid of photos.  To create that effect, I borrowed one of the longer, skinnier arrows from the All Boy file and sized it to my desired length.


I completed my custom title by including the year.  Lucky for me the Right Now Cards design included a bold, chunky '2015' that I was able to snag and incorporate into my design.


I hope this page reminds you that you can make your cut files work for you!  Adjust their sizes, widths and even combine files for a completely fun and custom look!

I'll be back soon with more to share.  In the meantime, happy crafting!

Friday, November 13, 2015

I always want to remember: A Just Nick DT Page

Good Friday morning, blog friends!  I've got a house full of sick kiddos to take care of, but I wanted to pop on here quickly to share a page that went live on the Just Nick blog today. 

All week long the designers have been sharing pages focused on the theme of 'Remember'.  That theme had me all mushy gushy and walking down memory lane through photos of my kids from years back.  It was a fun excuse to scrapbook these treasured photos I ran across and memories of them being little, that I never want to forget!

Supplies used: Just Nick - Word Tabs and Positives 3 Background cut files; Pink Paislee patterned paper and glitter stickers; Chickaniddy Crafts patternend paper; DCWV patterned paper (woodgrain); Heidi Swap chipboard frames; American Crafts thickers; Simple Stories sticker labels; Crate Paper chipboard frame; Studio Calico sequins; Kerri Bradford Studios stamped sentiment; Other: machine stitiching, computer font, foam adhesive, vellum.
I went for the obvious choice for my title.  Lucky for me, Nicole has all sorts of options for the word 'remember' in the cut file store.  I used the Word Tabs file.  I used the tabbed portion at the bottom to add my subtitle to the page.

I couldn't resist adding those sweet glittery bow stickers to my title.  They reminded me of a string you might tie to your finger to remember something.  Pretty perfect, huh?!


I snuck in some more Just Nick cut files, among the white space on my page.  The Positive Background 3 cut file was a subtle way to fill in those empty spaces and pull in some more plus signs, that appear in other places throughout the page.


Thanks so much for visiting me today!  I hope you sneak in some crafty time this weekend - that's definitely on my to do list!

Tuesday, October 27, 2015

Spooky Treat Bags: A Just Nick DT project

Good morning, friends!  The countdown to the holiday of treats and sweets is upon us!  It's not too late to craft up a few goodies to pass on to some of the special people in your lives, though.

I quickly crafted up a couple of festive treat bags using Just Nick's Spooky Stuff cut file, plain white bags and some basic embellishments from my stash.

Supplies used: American Crafts - white treat bags, diecut number, sequins, buttons; DCWV - patterned paper; Studio Calico - glitter banner; Pebbles - large gld paperclip; Stampin Up - stamped sentiment; Hero Arts - ink; Bazzill - cardstock; Other: vellum, crepe paper, crochet thread, seam binding ribbon, tags.
Here's a closer look at each of the bags and the details that make them come to life...


Pop over to the Just Nick blog to see my post featuring these projects.  Happy Halloween!
 

Thursday, October 22, 2015

Just Nick Cards


Good morning! I'm popping on here quickly today to share some recent cards I've made with a slew of fun Just Nick Studio cut files!

This first watercolored design uses Just Nick's Butterfly Background file.
 
Supplies used: Just Nick butterfly background cut file; Stampin Up inks; Hero Arts ink: Felicity Jane stamped sentiment; Doodlebug sequins and gems; Tim Holtz watercolor cardstock; machine stitching.

And a close of the design, in which I stamped this pretty sentiment from Felicity Jane. 


This pretty card features not one but THREE Just Nick files: Stems for Stephanie, Stems and Card Sentiments 1.

Supplies used: Just Nick cut files - Stems for Stephanie, Stems, Card Sentiments 1; Recollections cardstock; Maggie Holmes/Crate Paper chipboard hearts, photo overlay and vintage buttons; DCWV glitter cardstock and text paper; machine stitiching


The Scripty Phrases file is one of my very favorites from the Just Nick store.  I knew it would pair just perfectly with this love themed paper from Chickaniddy Crafts.

Supplies used: Just Nick scripty phrases cut file; Chickaniddy Crafts patterned paper; Crate Paper patterned paper; Doodelbug Designs enamel dots; Scotch/3M foam adhesive; Other - crochet thread


I used the 'hello' sentiment from the Word Brushstrokes file to create a simple and eyecatching focal point for my card.  Not only does the cut file serve as my greeting, but also creates added interest to the design since I've turned it into a shaker box. 


Supplies used: Just Nick word brushstrokes cut file; Chickaniddy patterned paper; Doodlebug cardstock and sequins; foam adhesive, ribbon, button, crochet thread.

 
To see more details surrounding each of these cards and cut file designs, hop on over to the Just Nick site and blog!

Tuesday, October 20, 2015

Always Legos: A Just Nick DT Page

Good morning!  A couple of weeks back I was thrilled to be included on the 'Boys 2 Men' themed week on the Just Nick blog!  With two sons, I have plenty of rough and tumble pages to scrapbook.
 
It has been awhile since I made a page for my oldest son's album.  Now that he's 10 the picture opportunities with him are fewer and farther between.  Fortunately, I had managed to capture this recent picture of him with one of his latest lego creations.  Since this is such a big part of him and what he enjoys, I knew it deserved to be highlighted in his scrapbook.
Supplies used: Just Nick open triangle cut file; American Crafts thickers; Studio Calico patterned paper; Echo Park patterned paper; My Mind's Eye patterned paper; Doodlebug Designs enamel dots; Other: machine stitching and Veteran Typewriter computer font.
I used the Open Triangle cut file to fill the background of my page.  I cut various sizes of the triangles out of white cardstock and used a combination of both the positive and negative cuts.


Filling the insides of the open triangles with varying patterned papers provides a fun way to add color and embellishment to the page.  I dug into an older Studio Calico 6X6" patterned paper stack and the Echo Park Teacher's Pet collection to fill my empty triangles, embellishing some of them with enamel dots and/or machine stitching.


My title and journaling are both tone on tone, to keep the focus on the picture and design.


Thanks for joining me today!  I hope you are finding some time to get crafty this week!

Sunday, October 18, 2015

#Funtimes: A Just Nick DT Page

Happy Sunday!  Did you happen to catch a peek of the 'Going in Circles' cut file that was featured on the Just Nick blog all week long? Isn't it fun?!  Not only is this new design awesome, but it's also the FREE download for October.  Yep, you read that right it's FREE until October 31st at midnight. Just add the Going In Circles Background to your cart and use the code: CIRCLESFREE at checkout and it's all yours!
 
I couldn't wait to use this design, accompanied by a favorite photo of my daughter from over the summer.  One quick look at the page and you can easily see why this design coordinated so perfectly with the snap of my little girl in a polka dotted inner tube - circles, circles and more circles!


Supplies used: Just Nick Going in Circles background and Hashtags 1 cut files; Pink Paislee patterned paper and diecuts; Simple Stories chipboard pieces and diecuts; October Afternoon buttons; We R Memory Keepers sequins; Kerri Bradford stamps; Stampin Up ink; Bazzill Cardstock; Other: foam adhesive, Silhouette, vellum.
I sized the file down, and cut it out of the same white cardstock that I used for the base of my page. Those open circles were just begging to be filled with snippets of fun and colorful papers, don't you think?!  A few strategically placed sequins and embellishments find a nice home among the circles, too!


If you haven't already noticed, I am constantly reaching for my stash of Kerri Bradford studio stamps.  In my opinion, you can never have enough text throughout a page.  A bright teal ink combined with these versatile sentiments, really jazz up those arrow diecuts.

 
I knew I'd need a bold font for my title, to prevent it from being overshadowed by the circle design on the top half of my page.  I turned to the Hashtags 1 cut file, knowing that the strong type and fun sentiments would be a great match.  I selected '#funtimes' - cutting it once from the same textured white cardstock and again from a subtle blue grid patterned paper. Using the blue diecut title as a shadow, creates interest and separation from the white background, while still maintaining cohesion. 
 
 
Check out the all the posts on the Just Nick blog this past week, to see how the design team used this freebie file, and grab your own.  But hurry because the file is only free until October 31st at midnight!

Friday, September 11, 2015

First Day Photos: A Just Nick DT Page

Good morning and happy Friday!  All week long on the Just Nick blog the design team has been sharing projects inspired by everything 'Back to School'.  Nicole's awesome cut files and the push to create something to fit the school theme, prompted me to pull out these photos from Emme's very first day of preschool, last year.


Supplies used: DCWV - cardstock; Simple Stories - patterned paper, die cuts, bradz, stickers; October Afternoon - flair, diecuts, patterened paper; Pebbles - patternend paper; Tim Holtz - mini attacher and staples; Other: foam adhesive, glue dots, Veteran Typewriter font.
I had a lot of pictures to include, so I knew I wouldn't have much leftover room for a large background file or intricate, detailed design.  Lucky for me, Nicole has files are versatile to fit just about any theme or projects parameters.  Admittedly, her word files are some of my favorites and what I naturally defaulted to for this page.  I used the word 'photos' from the Hashtags 1 file, to fill in the white space on my focal point photo, and complete my title.
 
 
I love that the font used for all of the text in this cut file, leaves out the spaces for the insides of the letters.  I used that as an opportunity to add some embellishment to the title, by pulling some coordinating heart diecuts and stapling into the center of each 'O'.
 
 
Adding the little bits and details at the completion of the page, is one of my favorite parts of the scrapbooking process.  I combined stickers from both Simple Stories and October afternoon to adorn my journaling card and finished off the cluster of elements with the cutest little piece of flair.
 
 
Thanks for stopping by!  I hope you'll check out the rest of the DT School project on the Just Nick blog this week!
 

Saturday, August 22, 2015

Captured...Summer Fun: A Just Nick DT Page

My kid's have officially completed their first week of school, as of yesterday afternoon. That means we are on to new routines and schedules, and summer days are quickly dwindling.  That also means, however, that I have lots of summer memories to scrapbook and reflect on.  This page celebrates one of our favorite family summer traditions: blueberry picking.


.
Supplies used: Crate Paper - patterned paper, diecuts, foam glitter words; Simple Stories - patterned paper; Pebbles - clothers pin; Bazzill Basics - vellum; Other - machine stitching, foam adhesive, seam binding ribbon; computer font - Veteran Typewriter
I am really loving the Poolside collection from Crate Paper.  It has so many versatile elements that can be used to scrap any type of summer memories - not just those associated with being in and by the water.  I layered several of the diecut pieces from this collection, for this pretty cluster to the right of my journaling and photo.  I love the pops of color and texture all of the layers add.

 
I used one of my favorite background Just Nick cut files - Circle 1 Background.  I opted to use the background design a bit untraditionally.  Rather than using it to fill the background of my page completely, I sized it down to around 8"x5".  At this size, the circle background acts more as a photo mat, making a home for both my photo and journaling block and a bit of extra embellishing.

When I first laid the circle background directly onto my striped patterned paper, it was hardly visible and completely overshadowed by the paper's color and design.  To make the cut file stand out and become more of a focal point, I backed it with an oversized matting of vellum and used foam adhesive to attach the diecut piece to my page.  Doing so, creates an extra layer of dimension and interest, and keeps the cool circle design from blending into the striped paper background.

 
Well, now I'm of to squeeze in a few more summer memories with my family, now that the weekend is here.  Happy Saturday and happy crafting!!!
 

Tuesday, August 18, 2015

YAY!...School starts today: A Just Nick DT Page

In my part of the world right now, everywhere you go is filled with signs of back to school.  All of the store shelves are stocked with supplies, alarms are set for earlier mornings and the kid's are all heading off with shiny new clothes and backpacks, to the start of new school year adventures. 

Today I'm sharing this page on the Just Nick blog, that is completely inspired by my current surroundings.  In fact, it proved to be just the push I needed to work on some first day of school pictures from the 2014-15 school year.


Supplies used: Doodlebug Designs - patterned paper, sequins, sprinkle shapes; DCWV - patterned paper (ledger); Basic Grey - patterned paper, letter stickers; Tim Holtz - mini paper clip; Bazzill - cardstock; Stampin Up - foam adhesive; Other - machine stitching, computer font.
Can you spot which Just Nick cut files I used on my back to school page?  I combined the Word Bubbles and Card Sentiments 1 files  to create my title.  Combining the two files was easy.  I sized the word bubble to fit within the spot I wanted it to sit, on my page and then layered the "YAY!" portion of the card sentiments file overtop of it. 

To give the word a little more 'pop', I backed the cut file with some red cardstock and used tiny letter stickers to complete my subtitle.


I couldn't stop myself at using only one word bubble - there are, in fact, several designs and styles included within the file.  Some sized down versions of the round bubble made the perfect home for a grouping of embellishments and even for some added text.


I even enlarged one of the rectangular bubbles to just over 6" long - making it an ideal spot for my journaling.

 
Did you know that every month, Just Nick releases a set of cut files that you can pick up for FREE?!  You're in luck, because the Word Bubbles file I've used above is the free file this month!  Hop on over to the Just Nick blog to see how you can add this digital die cut to your library for FREE.  And make it quick, because it's only available at no charge until August 31st.