Gams

Showing posts with label Echo Park. Show all posts

Tuesday, October 20, 2015

Always Legos: A Just Nick DT Page

Good morning!  A couple of weeks back I was thrilled to be included on the 'Boys 2 Men' themed week on the Just Nick blog!  With two sons, I have plenty of rough and tumble pages to scrapbook.
 
It has been awhile since I made a page for my oldest son's album.  Now that he's 10 the picture opportunities with him are fewer and farther between.  Fortunately, I had managed to capture this recent picture of him with one of his latest lego creations.  Since this is such a big part of him and what he enjoys, I knew it deserved to be highlighted in his scrapbook.
Supplies used: Just Nick open triangle cut file; American Crafts thickers; Studio Calico patterned paper; Echo Park patterned paper; My Mind's Eye patterned paper; Doodlebug Designs enamel dots; Other: machine stitching and Veteran Typewriter computer font.
I used the Open Triangle cut file to fill the background of my page.  I cut various sizes of the triangles out of white cardstock and used a combination of both the positive and negative cuts.


Filling the insides of the open triangles with varying patterned papers provides a fun way to add color and embellishment to the page.  I dug into an older Studio Calico 6X6" patterned paper stack and the Echo Park Teacher's Pet collection to fill my empty triangles, embellishing some of them with enamel dots and/or machine stitching.


My title and journaling are both tone on tone, to keep the focus on the picture and design.


Thanks for joining me today!  I hope you are finding some time to get crafty this week!

Saturday, May 25, 2013

Week of Layouts - Day Six: Hello My Name Is...First Grader

The last day of school is only just six school days away.  So I guess it's about time for me to share pictures from the first day, huh?! ;)  Can't believe my boy is about to be a second grader!

I used Echo Park's Take Note collection for this page.  I love all of the 'officey' themes it contains and think it's a great match for back to school photos.

Supplies used: Echo Park - patterned paper, letter stickers (Take Note collection); October Afternoon - journal cards, label stickers; Tim Holtz mini paper clip; Jillibean Soup - bakers twine; Stampin Up - notebook border punch; Veteran Typewriter font.
I mixed in a journal card and label sticker from October to add my text.  A tiny little paper clip is the perfect accent for this type of page.  I added a tiny bow of baker's twine just for fun, and to bring attention to the journaling.


Just a simple one for today!  I'll see you tomorrow with the LAST of my week of layouts posts.  Hope to see you then!
 

Wednesday, May 22, 2013

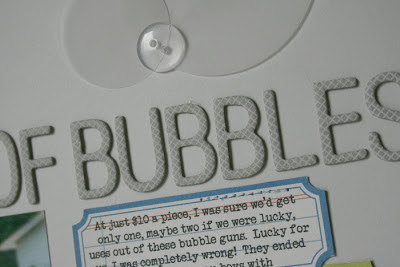
Week of Layouts - Day Three: Billions of Bubbles

I'm back again today sharing another two page layout.  I have had these fun photos of my boys in my 'to scrap' pile for quite some time.  I love the moments I captured here and their sweet little smiles, but was struggling with the color scheme a bit.  Yellow and purple?!  Admittedly, it's not a combo that I would typically be drawn too.  I finally ran across this paper in my stash from Echo Park and loved the way it complimented my pictures in color and theme, but definitely still allowed me to keep my pictures, the star of my page.

Supplies used: Cardstock - Bazzill (grey background), Diecuts with a View (purple), Patterned Paper - Echo Park (chevron, multi colored stripe, labels, blue dot scallop), Specialty Paper - Recollections (vellum), Chipboard letters - American Crafts Thickers (Amy Tangerine), Buttons - Autumn Leaves, Thread - Coats & Clark, Other - machine stitching, computer font (Veteran Typewriter)


The up, up and away border strip was a great match for all of the floating bubbles.  And, well, just about anything rainbow...and I'm in love!

 
I cut the labels from one of the patterned paper sheets.  After running them through my printer to add journaling, I stacked and stitched them to my page in this empty spot under the title.

 
I have been finding myself reaching for vellum over and over again recently.  It makes for a fun mix of 'bubbles' when combined with some clear buttons and ring shaped diecuts.

 
A closer look at the journaling.  As always, I had a lot to say... ;)

 
I used a set of Amy Tan thickers for the title.  I liked that they were close in color to the background cardstock creating a more subtle tone on tone effect to the title.


Thanks for joining me for yet another day of my 'Week of Layouts' feature!  I'll see you tomorrow with a page featuring the brand new Lakeside collection from Pebbles!
 

Wednesday, December 5, 2012

December Daily cover and foundation pages

I have been promising pictures of my December Daily for awhile now.  So, wait no more - I am finally sharing!!!  I actually had these all set to go at the end of last week, BEFORE December AND even posted them to the gallery at Two Peas (where I was the 'featured project'(!!!) on Friday - come here to check me out).  However, I didn't make it back to the blog before we headed out of town for a busy weekend.
 
But enough with the excuses...  Here is the fun stuff!  In an effort to actually get these pictures posted and this entry out of 'draft' form, I won't bore you with lots of text, but if you do have any questions about something I used or did, be sure to leave me a note in the comments.
 
Here is my pretty little tray that I've set up to leave out on my desk during the month of December.  I've filled it with all sorts of bits and baubles, tags and tapes and lots of other miscellaneous holiday items that may come in handy during the month.

 
And here is a look at the cover of the album.  I'm using an October Afternoon Here and Now chipboard album for the base.  I believe this particular one was part of the 9 to 5 collection, but I can't find it on their website.  As you look through the album you'll see that I'm planning to use the lined notebook style pages that came with it, but mixing in patterned papers (mostly from October Afternoon's Holiday Style collection from winter 2011) here and there, as well.


Here is the inside cover.  I plan to add some text to the right hand side describing the idea and theme of the album. 


The following images show some of the decorative details I've added as a starting point. 


To label the days throughout the month, I've pre-stamped these sweet little Martha Stewart scalloped tags.  I used an Ali Edwards Technique Tuesday stamp set (I believe it's the December Daily one from 2011), to stamp the numbers, month and circular label.  These tags will get sewn into the album, as I go.

 
I am happy to report, that as of this morning, I have officially updated my album through day 4!  Don't know that I always be this caught up, but I'll enjoy the fleeting feeling of accomplishment, while it lasts!  When I get a chance, I'll be back to show what the completed pages in my album look like.
 
Thanks for stopping by!
 

Monday, September 17, 2012

LCTS sketch #149

Happy Monday, everyone!  Hope you had a wonderful weekend.  We had the most beautiful weather here in Ohio, so I spent most of the weekend soaking up the sunny days with the fam and away from my craft desk.  I did however, squeak out a page for the latest Let's Capture These Sketches, sketch #149, that was revealed on Friday.  Here's the sketch...


I bet you'd never guess that that amount of white space, in the sketch, scared me a bit (wink!).  It's so very different from my own personal scrapping style -  I like to fill up my page with pictures, product and journaling!  But that is definitely part of the fun of working with sketches since it presents a bit of a challenge and jump start to your creativity!  So, to make the sketch work for me, I flipped it on it's side to accommodate my vertical photo and made a LARGE matting for said picture.

Supplies used: Echo Park Be Mine collection patterned papers, letter and phrase stickers, Tattered Angels - glimmer mist, Technique Tuesday stamps by Ali Edwards, Doodlebug doodletwine and brads, Making Memories flowers, Stampin Up - decorative label punch, Fiskars - circle punch, MAMBI - heart shaped gem, Other: machine stitching, computer font (2peas Chestnuts), buttons, embroidery floss, ribbon.

My journaling was printed out on a plain white tag.  I dressed it up with an Ali Edwards phrase, some twine and tucked it under the photo and large folded flower embellishment.


A few buttons, brads and a little bit of bling finished off the page.


Thanks for stopping by to check out my interpretation of the sketch.  I hope you'll pop on over the the LCTS blog to check out the work from the rest of the girls!


Sunday, May 6, 2012

National Scrapbook Day

Happy (one day belated) National Scrapbook Day to all of my crafty friends out there!  And for all those friends and family who read my blog - what do you mean, you didn't know that this was an actual holiday?  Mark it on your calendars for next year  -- I'll expect a phone call! ;)

Not that I needed another excuse to find some time to scrapbook, but having a holiday centered around my favorite hobby, certainly gave me one yesterday.  I was lucky to steal away a couple of hours in my crafting space to participate in a few of the challenges and festivities that many companies had posted online.  (Big thanks to my hubby for corralling the kiddos during that time!  Thanks, babe - smooches!).  Echo Park hosted a number of challenges on their blog throughout the day and I was excited to play along with a couple of them.  The first was to put together a card, using any of their products, in under two hours. I already had some of their 'Note to Self' line out on my desk and typically can crank out a card in under 30 minutes, so participation in this challenge was a no brainer.  Here's the results, featuring one of my favorite quote stickers from this collection:


Supplies used: Kraft cardstock, Echo Park's Note to Self Collection papers: Arrows and Red Dots, and Elements Stickers.  Other: ribbon and Jillibean woodgrain epoxy button.


It's a bit hard to see in the photograph, but I added glittered stickles to the top edge of the word 'icing' to mimic the dripping of actual icing.

Another of Echo Park's challenges required that you 'scraplift' one of the design team members projects posted on the blog.  I drew inspiration from a page by design team member, Leslie Ashe.  She titled her page 'Happy Days' which was also the name of the Echo Park paper collection that she used for the layout.  I was inspired to do the same, only using the aforementioned 'Note to Self' collection.


Supplies used:  Echo Park's Note to Self collection Alpha Stickers, Elements Stickers and papers: Red Dots, Quotes, Arrows, Inventory, Stripes.  Other: Jillibean baker's twine, jute, foam adhesive, date stamp, machine stitching, computer font and 'clock' brad from Echo Park's This and That Charming decorative brad pack.

A closer look at the title and journaling, and that cute little hand sticker.  As you can see, I added a baker's twine bow to the pointed finger to denote the idea 'reminding myself'.  When you read the journaling, you will see why the office/business feel of this line, worked so well with my goofy pictures. :)


There was a whole sheet of paper in this collection that featured these fun inventory tags.  I loved the idea of cutting out some of the individual tags to act as embellishments.


That's it for tonight, friends.  I've got lots more to share, so come back and visit me soon!

Saturday, March 31, 2012

Right now

A few months back, I ran across this list of verbs that a blogger had used to describe themselves at a current point in time:

enjoying...
eating...
drinking...
listening...
feeling...
thinking...
loving...
hating...
wearing...
thankful...

I loved the idea, and quickly jotted down the list - knowing that I would find a way to use it on a scrapbook page some time in the future.  Well, as I expected, I recently ran across the list again and immediately thought how fun it would be to do a page with a current picture of each family member and the accompanying list of verbs.  Sure, the kids couldn't exactly articulate these feelings for me (especially Emme), but I had a fun time dreaming up answers on their behalf -- and I think they paint a pretty good (and amusing) picture of each of us right now. 


Supplies used: Echo Park Dots & Stripes Metropolitan collection papers, Echo Park A Boy's Life collection 'Magnetic' paper, Echo Park Happy Days letter & border stickers, Doodlebug sequins, Tim Holz tiny attacher, Bella Blvd yellow chevron paper tape, Doodlebug star button, Teresa Collins 'Spring Fling' rhinestones, Stampin Up scallop punch, Teresa Collins Everyday Moments stamps, Technique Tuesday Ali Edwards Good Times stamps, We R Memory Keepers List stamps, Cricuit cartridges used: Boys will be Boys, Kate's ABC's, New Arrival.

So, you're probably wondering where exactly is that descriptive list, right?  Well, let's just say that you might get the full effect of this page in person, as it's a bit interactive, but hopefully the following photos will translate just as well as the actual page.

Since the text was a bit extensive, and I had already planned to include an 'icon' to represent each family member -- I decided that I would create a flap to hide the journaling beneath each person's photo and icon strip.  Here's a look at Tom's flap lifted and the journaling exposed:


And here is what is looks like when all of the flaps are lifted:


Kinda fun, huh?  I certainly know that we will enjoy looking back on these lists in the future!

As I mentioned, I thought it would be a fun touch to add a little icon/symbol that represents each one of us, below our picture.  Who am I kidding, I just wanted an excuse to pull out my cricuit and create some fun, little, embellished die cuts!  I think they turned out pretty cute and are certainly representative of each little family member!


And it appears that I'm having a little too much fun with the old, old, old Doodlebug sequins that I unearthed from my stash -- as they've now made an appearance on the last two pages I've completed!  I love how they look stapled onto the page with my mini attacher!


How cute is that yellow chevron tape too?  It's from Bella Blvd and was just released at the winter trade show.  I have a feeling you might be seeing that on many of my future projects, as well!


Thanks for stopping by!  I'm off to (hopefully!) cheer on the Buckeye basketball team to a final four win!  I've been distracting myself from the game up until now, but it's getting down to the wire.  O-H...!


Thursday, March 15, 2012

This and That

Each year, as my boys turn another year older, I try to put together a page highlighting a favorite photo of them at that age and what they are currently into and/or doing (favorite shows, toys, friends, likes, habits, etc).  When I saw Echo Park's new 'This & That, Charming' collection I knew it would be the perfect palette for this page in their yearbooks. 

The color story from this line is one of my favorites.  I love the combo of teal, green, black, yellow and how it's complimented by the woodgrain.  It provides such a great starting point for boy photos.  The first of the pages I put together was for TJ -- documenting him at six years old.  As you'll see, I enjoyed using and layering lots of the stickers from this line and couldn't get enough of the decorative brads, as well.

Supplies used:  Paper: Echo Park This & That Charming: Dots & Plaid, Border Strips, Green/Cream Solid, Vintage Fans Cardstock: Bazzill Stickers: Echo Park This & That Charming Element StickersEmbellishments: Echo Park This & That Charming decorative brad Other: computer font, MME baker's twine, Stampin' Up notch punch, foam adhesive

The globe sticker was a favorite of mine.  I was certain to include it on TJ's page because he is so into maps, wanting to know about other countries and just an 'explorer' in all sense of the word!!  So, I thought it was the perfect accessory to a page of him at this age!


Did I mention that I liked the decorative brads?!  Again the globe one was a favorite!  I think I squeezed seven of them on this one page.


Now it's Justin's turn.  I had more than one photo that I wanted to use on his page, and the filmstrip sticker strip proved to be the perfect way to add them onto this page.  I simply sized down the photos to fit inside the filmstrip frames, before printing them.  


Supplies used: Paper: Echo Park This & That Charming: Border Strips, Green/Cream Solid Cardstock: Bazzill Stickers: Echo Park This & That Charming Element Stickers Embellishments: Echo Park This & That Charming decorative brads, My Mind's Eye Miss Caroline Fiddlesticks "Lucky" twine, My Mind's Eye Fiddlesticks "Love" pin Other: machine stitching, computer font, foam adhesive, black ink pad, Technique Tuesday Ali Edwards stamps

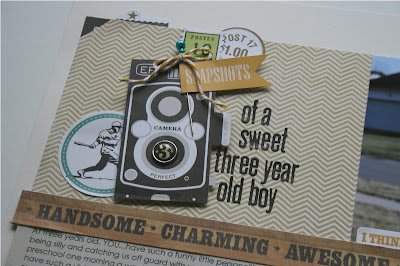
After starting with that cute filmstrip, I decided to continue with the photography theme of the page and built my title element on top of that darling vintage camera image and cute little banner with the word 'snapshots'.  I added the 'three' brad onto the camera lens, as that's Justin's age and dressed up the banner with a stick pin and baker's twine.


Again, more vintage cameras -- with the use of one of the paper borders.  I also pulled out my Technique Tuesday Ali Edwards, 'Life in Pictures' stamp set because it perfectly complimented this page.  I used the filmstrip, photo corner and this darling phrase, from the set.


I even put together this quick card with some of my leftover pieces.


I have quite a mess to clean up in my scrapbook space, with all of the projects I've been putting together.  So, I'm off to clean that.  I'll be back soon with more to share.  As always, thanks for stopping by!  I love to hear your comments -- so thanks so much to those who do!

Monday, February 27, 2012

A boy's life

As you know if you've browsed my scrapbooks or looked through my blog any number of times, I'm a huge fan of Echo Park. So, it should come as no surprise that I snatched up some of their latest collection, A Boy's Life.  Afterall, there are plenty of photos and stories about boys to be documented, in this household.  I loved the somewhat muted color palette, fun icons and clever word stickers that it included. 

The first page, features some cherished photos of my oldest son and one of his Dad around the same age, both riding in a car from my husband's childhood.  I love the fact that my in laws have saved so many toys from that time.  They provide my kids with great entertainment, of course, but also a glimpse into their Dad's life around similar ages as themselves.

Supplies used:  Echo Park A Boy's Life patterned papers:  Energetic, Hot Rod, Imagination, Magnetic, Charmer, Element and Alpha stickers


Here's a peek at the journaling:


I've seen (and pinned!) this circle idea several times and couldn't wait for the opportunity to try it on a scrapbook page.  The Boy's Life collection was perfect for this technique because there were so many great papers in this line that I wanted to use.  Using a multitude of small circles to incorporate all of these papers, was a fun way to highlight the collection, but still keep emphasis on the pictures and the story!


I put together a second page, as well.  This photo just makes me giggle!  I turned around one morning to find our youngest son staring back at me with this face exclaiming, "Look mommy, I have a moustache!".  Love that boy and his goofiness.  He really knows how to turn on the charm and make me smile (especially when he's up to no good!).

Supplies: all patterned paper and stickers, Echo Park A Boy's Life collection (Energetic, Imagination, Charmer, Elements stickers and Alpha stickers), Doodlebug boutique buttons and twine


I can't resist some fun little banner stickers, and thought the upper right corner of the page was calling for a little bit of decoration.


And a look at the journaling and title.  I really liked the font style of the letter stickers that went with this line.  They were great for a big, bold title.  I'm sure I'll find myself sneaking them into another project very soon.


That's all I've got for today.  I'll be back soon to share the progress I've made on my Project Life album.  I've been sticking with the monthly approach and I really love it!