Gams

Sunday, May 26, 2013

Week of Layouts - Day SEVEN: And so it begins

I made it to the final day of my 'week of layouts' feature!  Can you believe your eyes?!  I can hardly believe it myself!  It has been fun sharing so many of my recently completed pages with you.

This last page is a new favorite.  I have loved and hoarded the polaroid paper from the Dear Lizzy Neapolitan collection for quite some time.  I finally got the urge to use it when I saw how the dreamy, pastel colors would perfectly highlight these photos from my mom's retirement celebration. 

I cut and arranged a variety of the polaroid shapes onto my background, leaving room in the bottom left corner for my focal point photo.  Then, I resized my other photos to fit inside a select few of the polaroids.

Supplies used: American Crafts - thickers letter stickers, patterned papers, diecuts, buttons; Bazzill - embossed cardstock; My Mind's Eye - enamel dots; Hero Arts - heart shaped pearls; SEI - silver flower; Tim Holtz - tiny attacher; EK Success - heart punch; Other - crochet thread, machine stitching, computer font - Veteran Typewriter.
Each little polaroid was like a mini canvas to decorate, journal on or embellish.  Here I've added some punched and sewn hearts, a banner sentiment and Dear Lizzy button.

 
I split my journaling up onto three of the polaroid pieces, to provide myself with more room to write, and to carried the readers eye throughout the page.  What's a scrapbook page of mine without a bow and more buttons!

 
This last little frame houses a ticket from the collection's diecut pack.  It has the perfect little sentiment to sit next to and accent the main photo.

 
Thanks for joining me for my week of layouts!  I hope you are all enjoying the weekend and find some time to do a little something crafty!

Saturday, May 25, 2013

Week of Layouts - Day Six: Hello My Name Is...First Grader

The last day of school is only just six school days away.  So I guess it's about time for me to share pictures from the first day, huh?! ;)  Can't believe my boy is about to be a second grader!

I used Echo Park's Take Note collection for this page.  I love all of the 'officey' themes it contains and think it's a great match for back to school photos.

Supplies used: Echo Park - patterned paper, letter stickers (Take Note collection); October Afternoon - journal cards, label stickers; Tim Holtz mini paper clip; Jillibean Soup - bakers twine; Stampin Up - notebook border punch; Veteran Typewriter font.
I mixed in a journal card and label sticker from October to add my text.  A tiny little paper clip is the perfect accent for this type of page.  I added a tiny bow of baker's twine just for fun, and to bring attention to the journaling.


Just a simple one for today!  I'll see you tomorrow with the LAST of my week of layouts posts.  Hope to see you then!
 

Friday, May 24, 2013

Week of Layouts - Day Five: Hello My Sweet Love

Triangles have been popping up everywhere - design, home decor and scrapbooking!  As always, I enjoy incorporating new trends into my papercrafting process, but it often takes me a bit to catch on and figure out how to work said trends into my design style.

As I showed you in a page earlier this week, I have been having fun working with Dear Lizzy's new Lucky Charm collection.  There are so many great patterns and colors in this collection -- I wanted to find a way to incorporate as many as possible onto one project.  Lucky for me, the triangle trend came to the rescue! 

Image removed for publication.  Be back soon!

I made my own template for the triangle out of a scrap piece of paper, and used it to cut all of the triangle pieces on the page.  Since it was not a detailed shape, it took no time at all to snip a pile of pretty shapes.  From that point, I played around with the arrangement on my kraft background, staggering their positions and orientation.  I accented several of triangles with a row of machine stitching along their flat side and a few others with punches and stamping.


With all of the strong lines of the triangles, I knew I would need to add something to soften the page just a little.  A few well placed circles proved to be just the trick.  I started with the 'hello' diecut piece from the Lucky Charm pack and added an additional stamped sentiment to complete my title. 


I added a splash of circles throughout the rest of the page, with some gold gems and gold embossed chipboard pieces. I think those little details add a lot of movement to the page and draw your eye all the way around it.

 
It's been a fun week sharing a layout a day with you ... but I'm not done yet!  Come back and visit me on Saturday and Sunday for two more posts featuring all new scrapbook pages. 


Thursday, May 23, 2013

Week of Layouts - Day Four: Summer Memories

All week long on the Pebbles blog, the Design Team has been sharing projects with the new Lakeside collection. 

I probably say this every time Pebbles comes out with something new, but I think the Lakeside collection might be one of my all time favorites! Notably, that very statement is a bit ironic, because I would definitely not consider my family the type to have loads of camping or lake pictures (if any?!???). That just goes to show how very versatile the collection is and that it has elements that just about any scrapper could use. 

I loved all of the summer themed pieces in the line and the fact that they coordinated just great with this photo of my son frolicking in our backyard pool.

Supplies used: Pebbles - Lakeside Summer Camp (751465) Lakeside 6x6 Paper Pad (751473) Lakeside Phrase Stickers (732248) Lakeside Accent Stickers (732249) Lakeside Journaling Cards (732245) Lakeside Gift Tags (732235) Lakeside Chips (732241) Other: Studio Calico wood veneer hearts & journal card, My Mind's Eye enamel dots, Tim Holtz mini paperclip, Fonts - Hootie & Veteran Typewriter.
The gift tags were an instant favorite for me!  I love the brown string that is attached to each one.  But be forewarned, if you try to trim it any shorter it will unravel - I learned the hard way!  DOH! 

The 'summer memories' chipboard arrow not only serves at an embellishment, but as my page title too.  I added one of the new Studio Calico wood veneer hearts on top of it with a glue dot.  Because the colors of the two embellishments are so very close, it creates some fun but subtle texture.


All of the papers I used on this page, other than the background piece, were from the 6x6 paper pad.  I simply pulled them out of the pad and layered them onto my background with hardly any trimming. I added my journaling with an older Studio Calico journaling card and stitched it onto the coral patterned paper to attach it.


I'm not kidding when I say that this page practically scrapped itself! All of the elements in the collection work so seamlessly together!  I can't wait to make many more projects with this line.
 
Thanks for joining me for day four of my 'week of layouts'!  I'll be back tomorrow with, you guessed...another layout!  See you then!


Wednesday, May 22, 2013

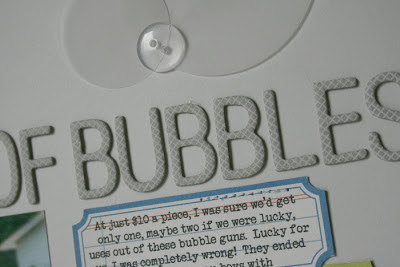
Week of Layouts - Day Three: Billions of Bubbles

I'm back again today sharing another two page layout.  I have had these fun photos of my boys in my 'to scrap' pile for quite some time.  I love the moments I captured here and their sweet little smiles, but was struggling with the color scheme a bit.  Yellow and purple?!  Admittedly, it's not a combo that I would typically be drawn too.  I finally ran across this paper in my stash from Echo Park and loved the way it complimented my pictures in color and theme, but definitely still allowed me to keep my pictures, the star of my page.

Supplies used: Cardstock - Bazzill (grey background), Diecuts with a View (purple), Patterned Paper - Echo Park (chevron, multi colored stripe, labels, blue dot scallop), Specialty Paper - Recollections (vellum), Chipboard letters - American Crafts Thickers (Amy Tangerine), Buttons - Autumn Leaves, Thread - Coats & Clark, Other - machine stitching, computer font (Veteran Typewriter)


The up, up and away border strip was a great match for all of the floating bubbles.  And, well, just about anything rainbow...and I'm in love!

 
I cut the labels from one of the patterned paper sheets.  After running them through my printer to add journaling, I stacked and stitched them to my page in this empty spot under the title.

 
I have been finding myself reaching for vellum over and over again recently.  It makes for a fun mix of 'bubbles' when combined with some clear buttons and ring shaped diecuts.

 
A closer look at the journaling.  As always, I had a lot to say... ;)

 
I used a set of Amy Tan thickers for the title.  I liked that they were close in color to the background cardstock creating a more subtle tone on tone effect to the title.


Thanks for joining me for yet another day of my 'Week of Layouts' feature!  I'll see you tomorrow with a page featuring the brand new Lakeside collection from Pebbles!
 

Tuesday, May 21, 2013

Week of Layouts - Day Two: Summer Story

I've scrapbooked several of the pictures that appear on the page I'm sharing today.  Yes, some of these photos I've scrapbooked twice.  And yes, some of these photos have a whole other page dedicated to them, alongside supporting photos and other memories, in our family scrapbooks.  But sometimes I find it's fun to do a 'highlights' style page, by combining various pictures from a time frame (in this case summer) to tell an entirely different story. 

I have been itching to use the Dear Lizzy Lucky Charm collection that I've purchased pieces of from here and there.  Since there was an array of colors happening in my photos, the colorful but subdued nature of this collection turned out to be a great compliment.

Supplies used: American Crafts - patterned paper & diecuts (Dear Lizzy), buttons, foam adhesive and twine; Studio Calico kraft heart stickers; My Mind's Eye button and enamel dots; Lily Bee rubon; Bazzill cardstock; Veteran Typewriter font; machine stitching.
The diecut packs are some of my favorite elements in each Dear Lizzy collection.  I love that the 'story' diecut is slightly ombre and gives the same look as if it has been cut with an expensive diecutting machine.  I worked my title around this piece because I simply liked it so much!

 
More diecuts are tucked here and there throughout the photo collage and accented with enamel dots and buttons, as well.


This sailboat diecut was a last minute addition.  I just felt the sentiment it held was too perfect not to include alongside these photos and memories.  So, I moved it around the page about until I found a nice spot for it here at the bottom right corner of the page.

 
I hope you'll join me back here tomorrow for day three of my 'Week of Layouts' feature! See you then!
 

Monday, May 20, 2013

Week of Layouts - Day One: Superheroes

Happy Monday morning blog friends!  In attempts to catch up on some of the many pages I need to get posted on the ole' blog, I'm (hoping!) to bring you a week full of layouts!  Sound fun?!?  Despite the busy nature of this time of year, I've been scrapping away, for both assignments and just for fun, so I have lots to share with you. 

Let's start off the week with a page I did for the Pebbles blog awhile back.  I never got around to sharing this page, mostly because I wanted to wait until I had a chance to finish up a companion page to go along with it. 

Anyone who knows my youngest son knows, beyond a dobut, that he is completely obsessed with anything and everything Batman!  So, when I got my box full of the Pebbles Winter CHA release, and layed eyes the Super Heroes piece of the Party with Amy Locurto collection, it was a no brainer for me to make a page documenting his sweet little obsession!  The fun images and kitschy sayings really added a special detail to the memories and photos of this fun stage in my son's life.

This was the original page that appeared on the Pebbles blog:

Supplies used: Pebbles - Party with Amy Locurto Super Kid (751454), Party with Amy Locurto Pow (751455), Party with Amy Locurto Incredible (751456), Party with Amy Locurto Kaboom (751457), Party with Amy Locurto Round Stickers (732220), Party with Amy Locurto Paper Flowers (732224), Basics Library Cards (747202), Basics Ash Washi Tape (747207), Basics Honeycomb Mini Dot (751377), Basics Ash Triangle Banner Kit (751403); Other - Basic Grey star pin, Bazzill cardstock, Westrim sequins, Fiskars border punch, American Crafts foam adhesive, machine stitching, computer font - Century Gothic.


Since I had so many pictures and of this little guy sporting his Batman gear, I knew I would need to add a second page.  I printed all my pictures at 2"x2" and layed them out in a simple grid pattern.  From that point it was quite easy to fill in the blanks with coordinating patterned papers and other little bits and details - like sequins, washi tape and stamped sentiments.


Here is a look at that two pages, as they will sit together, in his scrapbook.


Thanks for joining me on Day One of my Week of Layouts!  I'll see you tomorrow with another share!

Wednesday, May 15, 2013

Wedding Day Memories: A Bella Blvd Layout

In October, my husband and I will celebrate our twelve year anniversary.  It's hard to believe that we'll be reaching that milestone.  But maybe even harder to believe for some, that I've only scrapbooked ONE wedding page in those twelve years of marriage! HA!  I know, I know, kinda crazy for someone who scrapbooks everything, huh?  I guess my wedding pictures kinda scare me a bit.  I don't want to do something to mess them up! 

Fortunately, I was given just the push I needed to start scrapping some of those pics, with a recent Bella assignment.  Over on the blog this week, we are celebrating Stephanie's (owner of Bella Blvd) upcoming nuptials.  All of the design team members have put together a page documenting their very own wedding photos, and accompanied them with a bit of advice to the new bride and groom.  My page is up today, along with many beautiful others from my talented design team friends!  I hope you'll stop by and take a peek!

Supplies used: Bella Blvd - Love and Marriage: Turner Hall Ballroom, Cute Cuts, Smokeys in Love, Alpha+Bits, Miniatures The Wedding Party; Thankful: Cute Cuts, Alpha+Bits; Chip: Thankful Icons, Engagement Icons; Crochet Hearts: Scallop; Feathers: Cream; Other - Westrim sequins, American Crafts foam adhesive.
The feather adds some fun texture behind this piece of the subtitle.  To size it down to better fit this place on the page, I simply snipped the feather in half and layered the two halves on top of one another.  The 'seam' is hidden under the chipboard heart and creates the illusion of a smaller, fluffier feather.


Since I used many of the neutral patterns as my backdrop, I had fun adding lots of little stickers and embellishment pieces to dress up my page.

 
I can't do a page without some journaling, and this white space below my picture was calling for something to fill it.  I cut out the 'Wedding Day Memories' label from the Cute Cuts sheet to further accent it and use as my title.

 
Thanks for stopping by today and helping me walk down memory lane with these pictures and memories!
 

Thursday, May 9, 2013

Mornings with my BOY: Bella Blvd Layout

It's no secret that I love buttons.  In fact, it's not often that I make a page that doesn't include at least one button somewhere on the page! 

Bella's wood buttons are some of my favorites!  While I love the raw natural element that the wooden buttons add to my pages, I wanted to add an additional pop of color with my embellishing on this masculine page

Supplies used: Bella - Sophisticates: Tall Tags; Birthday Boy: Toadilly Cool, Borders, About a Boy, Just Write Journaling Stickers; Baby Boy: Baby Blue, Alpha+Bits; Thankful: Burlap; Ciao Chip: Baby Boy Icons; Button Market: Checkers; Designer Tape: Navy Dot; Other - Fiskars punches (circle and star), crochet thread, Versamark ink, American Crafts Zing embossing powder, and machine stitching.
To change up the color of some of the buttons, I simply flipped them to their flat (non-design) side, pressed them into a clear stamp pad, sprinkled on some colored embossing powder and used my heat tool to melt and secure the powder. The finished result is fun and textural, not too mention a great way to make your supplies work, no matter the color!

 
Another little trick I used on this page, to make my supplies work for me, was to alter the chipboard letters for the title.  The original color of the letters didn't quite go with the color palette I was trying to achieve on the page.  So, to make them work, I simply covered them with a coordinating Designer Tape, and trimmed off the excess with an xacto.  Easy Peasy!
 
 
To see lots more fun and creative uses for buttons, click on over to the Bella blog right here. See you soon!

Saturday, May 4, 2013

Happy National Scrapbook Day

Happy National Scrapbook Day!  Are you sneaking in any time to craft?  So far our day has been filled with an early morning baseball game and two (yes, two!) trips to the grocery store.  My oldest son said he wanted to scrapbook with me, in honor of my favorite holiday (so cute!), so I'm hoping to sneak down to my scrap space soon!

Whether your finding the time to craft or not, there is loads of additional inspiration on the net today.  Over on the Bella blog we are celebrating with layouts from all 24 designers!!!  How's that for some inspiration?!  Each member of the design team has put together an 'all about me' style page and answered some fun scrappy related questions.  The pages will be posted throughout the day, so be sure to check back often.


For my page, I decided to create a list of words and phrases that describe my personality, likes, favorites and current life roles.  I edited and printed my photo in black and white, so I would have no restrictions when it came to color.  That is certainly one of my favorite things about Bella products - the fun, bright colors!  Here's a look at my page...

Supplies used: Bella Blvd - Love and Marriage: May Eighteenth, Esther Fleming Floral, Smokeys in Love, Alpha+Bits (Wedding Day Specific); Engaged at Last: Bachelorette Extras, Bachelor Extras, Alpha+Bits Bachelor/ette; Sand and Surf: Paradise, Borders; All American: Chipboard Icons; Baby Boy: Just Write Journaling Stickers; Designer Tape: Chevron Combo; High Five Alphabet Stickers: Gulf; Crochet Hearts: Punch; Other: American Crafts cardstock and Dear Lizzy date stamp, My Mind's Eye enamel dots, Westrim sequins, Tsukineko ink, Cricut (Going places cartridge)
For the title, I used a combination of letter stickers, a sticker phrase and chipboard alphas.  The M and E I used for 'Me' are actually from the All American collection.  They are used to spell out the word American, but when removed from the word and covered in a matching patterned paper, they work great for this page!


I have been know to add a few sequins and enamel dots on each and every page I create lately!  And a speech bubble fits the occasion, no matter what!

 
If you are in the mood for some scrapbook shopping today, Bella has an awesome deal going on with their Warehouse Box Sale!  Check it out!  It could make a great gift for Mother's Day, or just because!
 
 
Happy Scrappy Day, friends!  Thanks for stopping by!


Thursday, May 2, 2013

Sketchy Thursday: Pebbles Layout


It's Sketchy Thursday over on the Pebbles blog today! I have a layout up based on this fun sketch by Becky Fleck:


The large vertical section of floral patterned paper from the sketch, inspired me to pull out some recent spring time pictures I had just printed. These are family pictures we snapped, just this past Easter. 

Image removed for publication.  Be back soon!


Other than switching up the orientation of one of the photos and the placement of the journaling, I stuck pretty closely to the sketch.
 
I used one of the chipboard elements from the Family Ties collection as my title - easy, peasy!

 
Initially I left off the pennant banner, but since that was one of my favorite elements from the sketch, I went digging back into my supplies to try and create my own. I found that the Accent and Phrase stickers from Love You More had sweet little pennant flags that would work just perfectly on my page, when strung along some baker's twine.  A tiny colored clothespin makes everything cuter!


I layered lots of flowers on this page of all mediums - chipboard, diecut, sticker, etc.  I finished most of them off with some hand cut patterned paper leaves.


Thanks for stopping by!