Gams

Friday, November 25, 2016

25 Days of Christmas Tags: Jillibean style

Hello, thanks for joining me on the blog!  Today, the Jillibean designers are taking part in the final day of the 25 Days of Christmas Tags with Tracey McNeely.
I reached for the Jillibean holiday stamp and shaker products to create this extra special tag.  You can't go wrong with a trio of cute snowmen inside of a sweet little snow globe, can you?!  This tag could adorn just about any holiday package.


I stamped my snowmen onto watercolor cardstock, so that I would be able to use my Zig clean color real brush markers to bring them to life.  A smattering of iridescent sequins and glass seed beads move about inside my shaker element, to add to the look of falling snow.


I took a bit of a risk by attempting to stamp and heat emboss on the outside of the shaker circle.  If you look closely, you'll see that the heat from my heat gun caused the plastic to warp a little bit, but it was nothing I couldn't mask with some additional miniature tags. *If you try this yourself - be sure to keep your heat gun moving, as not to disfigure and/or melt the plastic completely!


Make sure you check out Tracey's blog for a look at all of the tags designed by the rest of the Jillibean team and for your chance to win an awesome prize from Jillibean Soup!

Friday, May 13, 2016

PMU Silhouette 2 GIVEAWAY!!!

Hi friends and blog readers!  Sorry for my unexplained blogging absence.  I didn't intend to take such a break - oops! But with the busyness of the end of the school year and my kids in a million spring activities, I'm finding it easier to do most of my creative project sharing on Instagram.  Speaking of instagram, do you follow me over there (I'm @jaclynrenchstudio)?  I hope so, because I'm going to be doing a fun GIVEAWAY next week for my insta followers, with some extra goodies that I picked up at the Studio Calico warehouse sale!!!!  Fun, right?!

Well lucky for you, if you're visiting me today, you've stumbled upon another fun GIVEAWAY!


I am super excited to announce that I am one of the contributors to Nicole Nowosad's second Silhouette Essentials class being sponsored by PageMaps U.  If you're a silhouette user and interested in kicking up your skills a notch, then this class is for you!  It is loaded with beautiful layouts, cutting files, precise instructions, videos and so much more, and covers everything from printing and cutting custom shapes to making stencils and using your Picscan mat! This four-week course begins on Monday, June 6th. For your chance to win a spot in this class, simply leave a comment on this post and share what your favorite spring flower is (mine is the tulip!). I will draw a random winner on Saturday, May 14th.

Check out the sneak peek HEREIt looks awesome, doesn't it?!

I'll be back tomorrow evening to announce the winner (follow me on Instagram for extra entries!) and share some other things I've been working on.  See you then!  In the meantime, good luck and happy Fri-YAY! ;)

Friday, February 19, 2016

My Love List & Love Cards: My Creative Scrapbook

It's Friday and I'm here to share the last of my February main My Creative Scrapbook kit projects with you.  The first is a simpler page that documents a recent favorite photo of my daughter and I and my list of current 'loves'. 

Because the background paper I chose was so very busy, I chose to keep my design simple and limit my embellishments.  A kraft background is always a good go-to neutral when designing with lots of color and pattern. The extra added papers, diecuts and stickers are all more on the solid side and tie back into the different colors from the background paper.


With my kit leftovers, I created two quick cards for my sweet valentines.  I couldn't resist making this cute and funky porcupine the focus of one of my cards.  Isn't he fun?!


And I'm pretty certain this one will have to go to my hubby!  I love those lip stickers!

 
Thanks, as always, for joining me on my blog today.  I hope you have a happy weekend, filled with all things crafty!
 

Thursday, February 18, 2016

XOXO: My Creative Scrapbook

Good morning! I'm not quite done sharing my February My Creative Scrapbook kit projects with you. This kit was jam packed with items, and even after creating four pages and two cards I still have leftover items!

I love stretching the contents of a kit and making each page so very different from the last.  So far I have shared two pages featuring pictures of my daughter, because the color palette is so very girly.  However, the kit also works great for documenting those you love!  This page features a date night selfie of my husband and I.


It's no secret, I love labels!  Most of my pages include at least one. I cut apart the labels from one of the patterned paper sheets and used it to scatter my journaling down my page.  I mixed in some of the sticker and diecut labels for added pops of color and interest.  Machine stitching adds extra texture and interest to the design.


I'm sharing a tutorial over on the My Creative Scrapbook blog today for a couple of simple ways to alter your wood veneer shapes and sentiments.  It's certainly not a difficult process but can produce customized results, as I've done for my page title here.

Gold glitter embossing powder gives an extra pop to the 'XOXO' wood veneer and ties back in with the other gold elements on the page.

 
Thanks for visiting me today!  I'll be back tomorrow with the last of my projects created with the MCS February Main kit.
 

Wednesday, February 17, 2016

Hello Sweetie: My Creative Scrapbook

I'm back again today with another fun page created with the My Creative Scrapbook February Main kit.  This page is a little different for me but I really loved how it turned out!  There were so many pretty patterns in the We R Memory Keeper's Crush collection, that was the focus of the kit, I wanted to find a way to include as many of the prints as possible.  A heart punch and a top to bottom nestled heart pattern was the perfect formula.


When laying out my heart design, I made sure to keep an eye on color placement and ensure that each pattern was evenly dispersed and represented.

Lining the hearts up with one row upright and the following row upside down, allowed me to nestle the rows closely among one another.  This not only tied the rows together but creates a fun and unexpected element on the page.


Page titles are not my strong suit, so I looked to the contents of the diecut pack to give me a little help and inspiration.  Lucky for me there was the perfect option.  Since the two words I planned to use were different colors, I picked an additional diecut element (the butterfly) which had colors from both words, to compliment and tie the full title together.  A pretty dimensional ribbon bow was the perfect finishing accent to my title treatment.
 
 
I hope this page inspires you to get crafty!  See you tomorrow with more MCS kit projects to share!

Tuesday, February 16, 2016

I love your face: My Creative Scrapbook layout

It's my second month guest designing for My Creative Scrapbook and I am truly having so much fun with these kits!  The February Main kit is filled with items from the We R Memory Keepers Crush collection and wood veneers from Crate Paper's Hello Love.  As you might assume, there was certainly a love/valentine theme throughout the kit, but even so, I found it to be quite versatile and actually didn't even scrap a stitch of Valentines!

This page documents a recent favorite photo of my daughter and LOTS of journaling.  I wanted to record all of the little bits and pieces that make her who she is at four years old.


That floral watercolor paper was the inspiration and starting point for my page.  I knew it would pair nicely and be the perfect contrast to the denim and woodgrain in my photo. 

I loved the patterning and gradient of color on the sticker/chevron arrows.  Not only do they add a fun accent to the left column of the page, but they direct your eye to the important stuff - the story!


I loved putting together this cluster of elements on the right side of my photo.  Again, I started with the watercolor flower diecut, knowing it  would be complimentary to my photo and background.  From that point I played around with different sticker, diecut and dimensional embellishments until I landed on a pretty cluster of elements that wasn't too overdone.  The wood veneer arrow, again, directs your eye to focus of the page and the sweet 'I love your face' text sticker acts as a subtle page title.


Thanks for joining me today!  I'll be back again tomorrow with another page created from the My Creative Scrapbook February Main kit.


Monday, February 15, 2016

Ten: A Just Nick Layout

Good Monday morning!  I'm excited to get this week started because I've got a week's worth of projects to share with you! So, make sure you stop back by each weekday to see what's new.
 
Over the weekend I shared a project for the Just Nick Studio / Clique Kits blog hop.  If you missed that post and page, and the details of how to enter the giveaway, you can find it here.  I had so much fun pairing the kit contents and exclusive cut files that I couldn't stop creating and combining the two!  So, I'm sharing another page that resulted from this team up on the Just Nick blog and here, today.
 
 
CK_Feb16-CutFiles2
I used the bannered heart design, from the exclusive set of cut files, to cover the majority of the background.  I chose to forgo the banner style ends, and instead cut them off for a clean and straight edge.  The resulting cuts were sized at approximately 7.75"x1.5".  I cut five of them, from white cardstock, to fill my background.  Layering them atop of one another and under my picture creates cohesion throughout the design.


The open hearts were a great place to introduce lots of color and pattern from the kit papers into my design.  I even used the included sequin mix to back some of my hearts and add a little extra detail and shimmer. 

Some foam mounted stickers, stictching and a Thicker title were the finishing touches atop my background design.


The combination of the Hot Mess kit and Just Nick designs is a pretty perfect pairing, wouldn't you agree?  The are both so full of product, design and versatility, that I've got one more page combining the two that I will share with you later in the month.
 
I hope to see you back here tomorrow as I start to share the projects I've made with My Creative Scrapbook's February Main kit!

Saturday, February 13, 2016

Just Nick/Clique Kits blog hop

Happy Saturday!  Today I'm participating in a fun blog hop between Just Nick Studios and Clique Kits kit club.  If you are following along the hop, you should have landed here from Carolina Schulz's blog.   A $25.00 gift certificate to the clique kits shop will be awarded to one person who comments along the hop.  So, make sure to keep hopping and leave comments to be entered to win!

 
If it's your first time joining me on my blog - welcome, I'm so happy to have you here!  I had so much fun combining the Clique kits Hot Mess kit and exclusive Just Nick files and I'm excited to share the results with you...


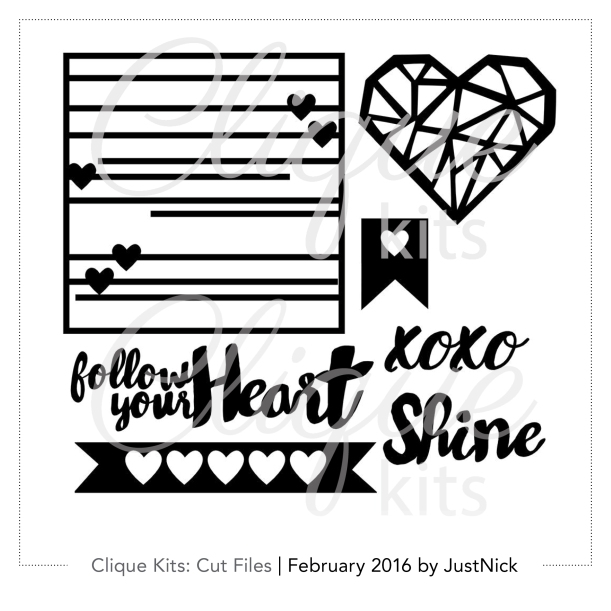
The lined heart filled square file was my favorite, of the exclusive designs.  I knew at first glance that it would make the perfect 'memo board' background for my page. The original design was square, but by using the erase and weld functions in the silhouette software, I was able to join two squares atop of one another resulting in a taller design and more surface to my 'memo board'.
 
All of the Maggie Holmes Shine collection ephemera and stickers, included in the Clique Kit were a great companion to this idea and design.  They allowed me to create a pretty collage of elements that I clipped to my background and used to accent my pictures.
 

The wood veneer heart outline, just so happened to fit perfectly atop of one of the diecut hearts, and the various heart stickers included in the kit were a fun and complementary accent.
 

Tags are a natural element on any memo board, and there were certainly many to choose from in this kit.  I also loved that I could clip a couple of the transparent diecut tabs onto the horizontal lines of my diecut background.
 
 
The combination of this kit and the coordinating cut files are a perfect match, wouldn't you agree?  In fact, I've had so much fun with this pairing that I've made two more pages that I'll be sharing on my blog in the coming weeks.  I hope you'll stop back by to see them!
 
Thanks so much for joining me and letting me share my project with you today! Don't forget that A $25.00 gift certificate to the clique kits shop will be awarded to one person who comments along the way.
 
Your next stop on the hop is Aliza Deutsch, so click on over to see what wonderful things she has in store!


Friday, February 12, 2016

DCWV: Valentine's Envelope Treat Sleeves

Happy Friday blog friends!  If you're making any Valentine's gifts for your sweeties this year - it's crunch time!  Lucky for you I'm sharing a sweet and easy to assemble treat idea.  The supplies are simple and the result is not only yummy but adorable.

 
The cuter the packaging, the sweeter the treat, right?!  I used DCWV's Envelope's DIY Project Stack to jump start my project.  I was thrilled to find a pattern for the treat sleeve in this stack.  I chose a pretty pink ombre, text, and black and white arrow pattern papers, to compliment the Valentine theme.


It's no secret that I love to bake, so I've filled my treat sleeves with a half dozen mini cookies.  If you're not a baker, or don't have time you could easily substitute conversation hearts, packaged chocolates or even store bought cookies.


I wanted to give my recipient a peek at what was inside the sleeve, so I cut a small circle-shaped window out of the front portion.  My cookies are enclosed in a clear bag, so while the window reveals a peek, the treats remain secure inside.


A simple bit of ribbon, stamped sentiment, punched heart and DCWV gem sticker finish off the design and presentation of my baked goodies.


I hope this post inspires you to whip up a little something for those you love and appreciate.  We gifted several of these to my kid's teachers and I'm saving a few more for my favorite GAL-entines!  Happy heart day!

Sunday, January 10, 2016

My Creative Scrapbook Layout: Dance Forever & Disney

Happy Sunday,  I hope you are enjoying the last bit of your weekend!  We got our first official snow of the winter and have been thoroughly enjoying it!  We spent the morning watching it fall out our windows, then bundled up and played in it after lunch.  Now we're inside again warming up with cocoa.  Pretty perfect Sunday, if you ask me!  It would be completely perfect if I could squeeze in a little scrapbooking time, so that is next on the agenda!

But before I do that, I thought I'd share with you, the last of the two pages I put together with My Creative Scrapbook's January Main kit.

One single, sweet diecut was the inspiration for this page.  See the round 'dance forever' diecut in the bottom right corner of my page?  Right when I saw it, it reminded me that I was still waiting on the perfect product to scrap my little girl's dance pictures.


The 3x4" Happy Place collection brag cards and diecut pieces were my favorite parts of the kit.  In fact, the brag cards made for a quick and easy grid style layout to my page.  They were the perfect surface to add bits of my journaling, extra embellishment and layers.


The last page I created from the kit, makes a bold statement using the diecut letters as both my title and background.

 
I just couldn't resist those letters!  The font and the colors are just perfection and both paired nicely with some of my favorite family Disney memories.  While this page has no real title - the page theme is clear, by the words used to 'mat' my photos.


Again, I snuck in more diecuts and button embellishments to accent my page.


 Thanks for joining me today!  I hope the rest of your weekend is cozy and crafty!
 

Wednesday, January 6, 2016

My Creative Scrapbook Layout: A Perfect Snap

As promised, I'm back today with one of the layouts I created for my guest stint over at My Creative Scrapbook

If you have children or at the very least, have tried to take a picture with 2 or more, you know what a challenge it can be.  It's darn near impossible to get everyone smiling, happy and looking at the camera at the same time, am I right?!  That 'perfect snap' is my one and only wish each Mother's Day, and as you can see, it's often hard to come by.  But the outtakes are part of the memory, so I thought they would be fun to include on this page.


The Fancy Pants 3x4 Brag card made for the perfect title for my page, even if it hints at a bit of sarcasm!  The quotations reinforce the tongue and cheek nature of my title, in addition to the added text I included by running the 3x4 card through my printer.


This paper collection includes so many great diecuts that I tried my best to squeeze in as many as I could.  Layering the diecuts among the 3x4 cards, photos and themselves ties all of the elements of the page together and gives them each a home.


Thanks for stopping by today!  I'll be back again tomorrow with another kit page to share!
 

Tuesday, January 5, 2016

MCS Guest Designer: Home Decor Project

If you follow me over on Instagram, you may have seen that I've been sharing sneak peeks of a project I had been working on during the month of December.  Well, today I'm finally able to share what that project is -- I've been selected as the guest designer for My Creative Scrapbook kit club for the months of January - March!

I got to work with their Main Kit, the contents of which were revealed on their blog and social media accounts today...


As you can see it's full of the Fancy Pants Happy Place collection, which is just as beautiful and fun to work with, as it appears!

I made four separate projects with this kit that I'll be sharing in the coming days.  The first, and maybe my most favorite of the projects is this altered home décor piece.  I used a Jillibean Soup 'Mix the Media' receipt holder from my stash, along with some recent family photos and the kit contents to create this piece.

 
Here are some close ups...


Stay tuned to the My Creative Scrapbook blog for a tutorial I put together showing how to make this fun heart shaped button embellishment.
 
 
I'll be back again tomorrow to share one of the three additional layouts I made with this kit. I hope you'll join me!
 

Monday, January 4, 2016

Design Team News and a Sneak!


Happy New Year!  I am excited to be ringing in 2016 with a fun little announcement - I have been asked to continue my term with the Just Nick design team!
 
As you can see there is loads of talent on the 2016 team and Nicole's got some fun and exciting things planned for Just Nick in the new year.
 
My design team intro (or should I call it 'refresher') is up on the blog today.  We were also tasked with the assignment to create and all about me page.  I went to work with the capture this and basic hearts cut files along with some Simple Stories I AM collection products to put together my page. 
 
Here is a peek at the page....


I hope you'll head over to the Just Nick blog to see the rest!