Gams

Showing posts with label 1 photo layout. Show all posts

Friday, February 19, 2016

My Love List & Love Cards: My Creative Scrapbook

It's Friday and I'm here to share the last of my February main My Creative Scrapbook kit projects with you.  The first is a simpler page that documents a recent favorite photo of my daughter and I and my list of current 'loves'. 

Because the background paper I chose was so very busy, I chose to keep my design simple and limit my embellishments.  A kraft background is always a good go-to neutral when designing with lots of color and pattern. The extra added papers, diecuts and stickers are all more on the solid side and tie back into the different colors from the background paper.


With my kit leftovers, I created two quick cards for my sweet valentines.  I couldn't resist making this cute and funky porcupine the focus of one of my cards.  Isn't he fun?!


And I'm pretty certain this one will have to go to my hubby!  I love those lip stickers!

 
Thanks, as always, for joining me on my blog today.  I hope you have a happy weekend, filled with all things crafty!
 

Thursday, February 18, 2016

XOXO: My Creative Scrapbook

Good morning! I'm not quite done sharing my February My Creative Scrapbook kit projects with you. This kit was jam packed with items, and even after creating four pages and two cards I still have leftover items!

I love stretching the contents of a kit and making each page so very different from the last.  So far I have shared two pages featuring pictures of my daughter, because the color palette is so very girly.  However, the kit also works great for documenting those you love!  This page features a date night selfie of my husband and I.


It's no secret, I love labels!  Most of my pages include at least one. I cut apart the labels from one of the patterned paper sheets and used it to scatter my journaling down my page.  I mixed in some of the sticker and diecut labels for added pops of color and interest.  Machine stitching adds extra texture and interest to the design.


I'm sharing a tutorial over on the My Creative Scrapbook blog today for a couple of simple ways to alter your wood veneer shapes and sentiments.  It's certainly not a difficult process but can produce customized results, as I've done for my page title here.

Gold glitter embossing powder gives an extra pop to the 'XOXO' wood veneer and ties back in with the other gold elements on the page.

 
Thanks for visiting me today!  I'll be back tomorrow with the last of my projects created with the MCS February Main kit.
 

Wednesday, February 17, 2016

Hello Sweetie: My Creative Scrapbook

I'm back again today with another fun page created with the My Creative Scrapbook February Main kit.  This page is a little different for me but I really loved how it turned out!  There were so many pretty patterns in the We R Memory Keeper's Crush collection, that was the focus of the kit, I wanted to find a way to include as many of the prints as possible.  A heart punch and a top to bottom nestled heart pattern was the perfect formula.


When laying out my heart design, I made sure to keep an eye on color placement and ensure that each pattern was evenly dispersed and represented.

Lining the hearts up with one row upright and the following row upside down, allowed me to nestle the rows closely among one another.  This not only tied the rows together but creates a fun and unexpected element on the page.


Page titles are not my strong suit, so I looked to the contents of the diecut pack to give me a little help and inspiration.  Lucky for me there was the perfect option.  Since the two words I planned to use were different colors, I picked an additional diecut element (the butterfly) which had colors from both words, to compliment and tie the full title together.  A pretty dimensional ribbon bow was the perfect finishing accent to my title treatment.
 
 
I hope this page inspires you to get crafty!  See you tomorrow with more MCS kit projects to share!

Tuesday, February 16, 2016

I love your face: My Creative Scrapbook layout

It's my second month guest designing for My Creative Scrapbook and I am truly having so much fun with these kits!  The February Main kit is filled with items from the We R Memory Keepers Crush collection and wood veneers from Crate Paper's Hello Love.  As you might assume, there was certainly a love/valentine theme throughout the kit, but even so, I found it to be quite versatile and actually didn't even scrap a stitch of Valentines!

This page documents a recent favorite photo of my daughter and LOTS of journaling.  I wanted to record all of the little bits and pieces that make her who she is at four years old.


That floral watercolor paper was the inspiration and starting point for my page.  I knew it would pair nicely and be the perfect contrast to the denim and woodgrain in my photo. 

I loved the patterning and gradient of color on the sticker/chevron arrows.  Not only do they add a fun accent to the left column of the page, but they direct your eye to the important stuff - the story!


I loved putting together this cluster of elements on the right side of my photo.  Again, I started with the watercolor flower diecut, knowing it  would be complimentary to my photo and background.  From that point I played around with different sticker, diecut and dimensional embellishments until I landed on a pretty cluster of elements that wasn't too overdone.  The wood veneer arrow, again, directs your eye to focus of the page and the sweet 'I love your face' text sticker acts as a subtle page title.


Thanks for joining me today!  I'll be back again tomorrow with another page created from the My Creative Scrapbook February Main kit.


Monday, February 15, 2016

Ten: A Just Nick Layout

Good Monday morning!  I'm excited to get this week started because I've got a week's worth of projects to share with you! So, make sure you stop back by each weekday to see what's new.
 
Over the weekend I shared a project for the Just Nick Studio / Clique Kits blog hop.  If you missed that post and page, and the details of how to enter the giveaway, you can find it here.  I had so much fun pairing the kit contents and exclusive cut files that I couldn't stop creating and combining the two!  So, I'm sharing another page that resulted from this team up on the Just Nick blog and here, today.
 
 
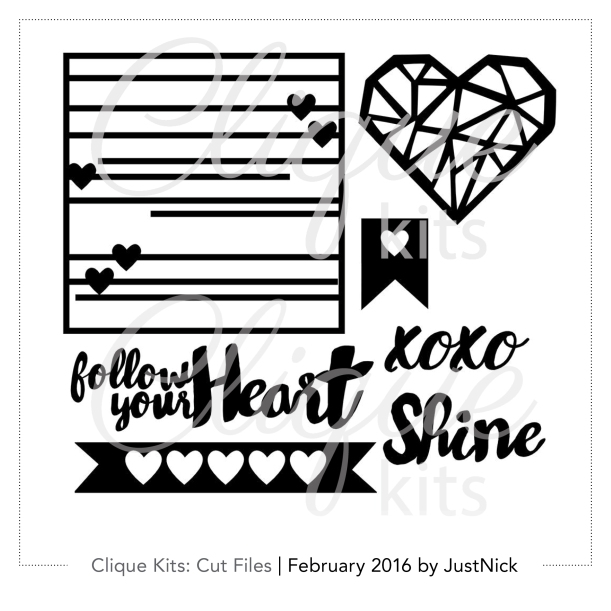
CK_Feb16-CutFiles2
I used the bannered heart design, from the exclusive set of cut files, to cover the majority of the background.  I chose to forgo the banner style ends, and instead cut them off for a clean and straight edge.  The resulting cuts were sized at approximately 7.75"x1.5".  I cut five of them, from white cardstock, to fill my background.  Layering them atop of one another and under my picture creates cohesion throughout the design.


The open hearts were a great place to introduce lots of color and pattern from the kit papers into my design.  I even used the included sequin mix to back some of my hearts and add a little extra detail and shimmer. 

Some foam mounted stickers, stictching and a Thicker title were the finishing touches atop my background design.


The combination of the Hot Mess kit and Just Nick designs is a pretty perfect pairing, wouldn't you agree?  The are both so full of product, design and versatility, that I've got one more page combining the two that I will share with you later in the month.
 
I hope to see you back here tomorrow as I start to share the projects I've made with My Creative Scrapbook's February Main kit!

Tuesday, October 20, 2015

Always Legos: A Just Nick DT Page

Good morning!  A couple of weeks back I was thrilled to be included on the 'Boys 2 Men' themed week on the Just Nick blog!  With two sons, I have plenty of rough and tumble pages to scrapbook.
 
It has been awhile since I made a page for my oldest son's album.  Now that he's 10 the picture opportunities with him are fewer and farther between.  Fortunately, I had managed to capture this recent picture of him with one of his latest lego creations.  Since this is such a big part of him and what he enjoys, I knew it deserved to be highlighted in his scrapbook.
Supplies used: Just Nick open triangle cut file; American Crafts thickers; Studio Calico patterned paper; Echo Park patterned paper; My Mind's Eye patterned paper; Doodlebug Designs enamel dots; Other: machine stitching and Veteran Typewriter computer font.
I used the Open Triangle cut file to fill the background of my page.  I cut various sizes of the triangles out of white cardstock and used a combination of both the positive and negative cuts.


Filling the insides of the open triangles with varying patterned papers provides a fun way to add color and embellishment to the page.  I dug into an older Studio Calico 6X6" patterned paper stack and the Echo Park Teacher's Pet collection to fill my empty triangles, embellishing some of them with enamel dots and/or machine stitching.


My title and journaling are both tone on tone, to keep the focus on the picture and design.


Thanks for joining me today!  I hope you are finding some time to get crafty this week!

Sunday, October 18, 2015

#Funtimes: A Just Nick DT Page

Happy Sunday!  Did you happen to catch a peek of the 'Going in Circles' cut file that was featured on the Just Nick blog all week long? Isn't it fun?!  Not only is this new design awesome, but it's also the FREE download for October.  Yep, you read that right it's FREE until October 31st at midnight. Just add the Going In Circles Background to your cart and use the code: CIRCLESFREE at checkout and it's all yours!
 
I couldn't wait to use this design, accompanied by a favorite photo of my daughter from over the summer.  One quick look at the page and you can easily see why this design coordinated so perfectly with the snap of my little girl in a polka dotted inner tube - circles, circles and more circles!


Supplies used: Just Nick Going in Circles background and Hashtags 1 cut files; Pink Paislee patterned paper and diecuts; Simple Stories chipboard pieces and diecuts; October Afternoon buttons; We R Memory Keepers sequins; Kerri Bradford stamps; Stampin Up ink; Bazzill Cardstock; Other: foam adhesive, Silhouette, vellum.
I sized the file down, and cut it out of the same white cardstock that I used for the base of my page. Those open circles were just begging to be filled with snippets of fun and colorful papers, don't you think?!  A few strategically placed sequins and embellishments find a nice home among the circles, too!


If you haven't already noticed, I am constantly reaching for my stash of Kerri Bradford studio stamps.  In my opinion, you can never have enough text throughout a page.  A bright teal ink combined with these versatile sentiments, really jazz up those arrow diecuts.

 
I knew I'd need a bold font for my title, to prevent it from being overshadowed by the circle design on the top half of my page.  I turned to the Hashtags 1 cut file, knowing that the strong type and fun sentiments would be a great match.  I selected '#funtimes' - cutting it once from the same textured white cardstock and again from a subtle blue grid patterned paper. Using the blue diecut title as a shadow, creates interest and separation from the white background, while still maintaining cohesion. 
 
 
Check out the all the posts on the Just Nick blog this past week, to see how the design team used this freebie file, and grab your own.  But hurry because the file is only free until October 31st at midnight!

Saturday, August 22, 2015

Captured...Summer Fun: A Just Nick DT Page

My kid's have officially completed their first week of school, as of yesterday afternoon. That means we are on to new routines and schedules, and summer days are quickly dwindling.  That also means, however, that I have lots of summer memories to scrapbook and reflect on.  This page celebrates one of our favorite family summer traditions: blueberry picking.


.
Supplies used: Crate Paper - patterned paper, diecuts, foam glitter words; Simple Stories - patterned paper; Pebbles - clothers pin; Bazzill Basics - vellum; Other - machine stitching, foam adhesive, seam binding ribbon; computer font - Veteran Typewriter
I am really loving the Poolside collection from Crate Paper.  It has so many versatile elements that can be used to scrap any type of summer memories - not just those associated with being in and by the water.  I layered several of the diecut pieces from this collection, for this pretty cluster to the right of my journaling and photo.  I love the pops of color and texture all of the layers add.

 
I used one of my favorite background Just Nick cut files - Circle 1 Background.  I opted to use the background design a bit untraditionally.  Rather than using it to fill the background of my page completely, I sized it down to around 8"x5".  At this size, the circle background acts more as a photo mat, making a home for both my photo and journaling block and a bit of extra embellishing.

When I first laid the circle background directly onto my striped patterned paper, it was hardly visible and completely overshadowed by the paper's color and design.  To make the cut file stand out and become more of a focal point, I backed it with an oversized matting of vellum and used foam adhesive to attach the diecut piece to my page.  Doing so, creates an extra layer of dimension and interest, and keeps the cool circle design from blending into the striped paper background.

 
Well, now I'm of to squeeze in a few more summer memories with my family, now that the weekend is here.  Happy Saturday and happy crafting!!!
 

Monday, August 17, 2015

Pool: A Just Nick DT Page

It's been a busy summer here at the Rench household.  Unfortunately, that has kept my sharing here on the blog to a minimum, but that also means that I have some catching up to do and lots of projects to share with you in the coming days.

Today I'm excited to share a page I had featured on the Just Nick blog, for summer week.

Summer for me and my kiddos means countless hours at the local community pool, so it was an obvious choice for me to scrap some of those memories.  I've been eyeing the Marquee Alpha
for awhile.  It was just the pop I needed to draw some serious attention to my title, amongst a page with lots of photos and lots of journaling. 


Supplies used: Just Nick "Marquee Alpha' cut file; Crate Paper - patterned paper, diecuts, puffy stickers, chipboard frames; American Crafts - twine; Scrapbook Adhesives - foam adhesive; Tombow - adhesive; Other - computer font (Veteran Typewriter), machine stitching.
Isn't the detail in this font amazing?  Even when it's sized down to just an inch and a quarter high, as I've done for my page title, it still makes a strong impact on the page.


To add even more dimension to these fun title letters I cut one set of each letter from my pattern paper and three additional sets of the title letters from kraft cardstock.  Adhering each of the three kraft layers on top of one another and finishing off each letter with the patterned paper version creates lots of dimension.  In fact, the letters almost feel and look as if they are chipboard, which in this case, coordinated perfectly with the other chipboard elements on the page.


Without a doubt, one of my favorite pieces of every Crate Paper collection are the chipboard frames.  I used several in my collage of photos to make some of my favorite pictures stand out.  This wood grain chipboard frame, fit perfectly around the picture of my girl enjoying her first root beer float.  Accenting it with the darling little popsicle diecut, was a no brainer!


This particular frame makes a big impact when attached to the page with foam adhesive.  It highlights a fun photo of my boy and his buddy and makes it stand out from the collage of pictures and diecuts surrounding it.

 
That's it from me today!  I'll be back often this week with lots more to share.
 

Monday, June 15, 2015

U...Right Now: A Just Nick DT page

Happy Monday! I announced in my post yesterday that I'm part of the the inaugural Just Nick design team.  Today is my first official post on the Just Nick blog, where I'm sharing this page starring my handsome six year old.  Isn't he cute, faux hawk and all?!


Supplies used: Just Nick cut files - Right Now, All Boy; Jillibean Soup -patterned paper, diecuts, stickers, enamel stars; Crate Paper - transparent letter; American Crafts - thicker, twine; October Afternoon - sticker labels, buttons, flair; Zig - Wink of Stella brush pen; Teresa Collins - enamel dots; Other - machine stitching, cardstock, foam adhesive, Veteran Typewriter font, date stamp, black ink pad.
I love adding pages to my kid's scrapbooks that highlight their interests, hobbies and personality traits for each year of their life.  The Right Now cut file, reminded me that I hadn't yet put together a page for my son's sixth year, since it was the perfect title for this type of 'highlight' page.

I love the mix of type in this cut file - it includes both a clean type and funky script.  The original design also includes a circle around the entirety of the design.  However, since I knew I'd be using a lot of linear elements on my page, I opted to remove the circle and simply cut the words.

Once sized, I cut the title two times - once out of cream cardstock and a second time from gray cardstock.  I layered the two cuts together, slightly offsetting the top piece, to create some added shadow and dimension.

 
The majority of my page is pretty busy and colorful, so I opted for a kraft background to ground the whole design.  With the cardstock background in place, the margins of my page still created a little more white space than I was going for.  To solve that problem, I cut some stars from the All Boy cut file out of the same kraft cardstock and layered them over the background piece to create a tone on tone effect.  To make those diecut stars pop just a little bit more, but still not overwhelm the remainder of the design, I colored them with a layer of Wink of Stella brush pen glitter.  The end result turned out to be subtle but cool!
 
 
The fun mix of patterned papers on this page can't be forgotten.  They are all from Jillibean Soup's 'Cool as a Cucumber Soup' collection.  I loved all the patterns so much, I cut 2" squares of my favorites and placed them in an incomplete grid on my background.  Lots of stiching and embellishments tie the entire design together!
 
 
Thanks for joining me today!  I hope you'll stop by the Just Nick blog and let me know what you think of my first post!

Sunday, June 14, 2015

XOXO: A Just Nick DT page

I am excited to announce that I've been asked to join the Just Nick design team!  My introduction post went up on the blog last week, where I shared this page using the heart background cut file.


Supplies used: Just Nick Studio - heart background cut file; Chickaniddy - patterned papers, enamel words; Kerri Bradford Studio - stamps; American Crafts - patterned paper; Crate Paper - fabric brad; October Afternoon - buttons; Doodlebug Designs - sequins; Studio Calico - transparent words; Bella Blvd - felt bow; Hero Arts - black ink; Other: machine stitching, date stamp, Veteran Typewriter font.
It's no secret that I can't get enough of using hearts on my pages and projects, so naturally I chose this to be the first of Nicole's cut files to work with.  I've been hanging on to a stack of the Chickaniddy papers that I ordered from Paper Issues awhile back.  All the fun prints and colors I had accumulated were great fillers for this open heart design.  Throw in a few sequins, stitching and miscellaneous embellishments and it makes for a fun and colorful focal point of the page.
 

I printed my journaling strategically below the cut file and finished off that part of the page with a transparent diecut word, stapled to the page, to act as my title.

 
I picked up some of the Chickaniddy enamel pieces to coordinate with the papers I purchased, so I of course, had to sneak a couple of those onto my page.  How fun are the enamel words?!?  This ' love you' sentiment fit in well with the journaling and overall theme to my page.
 
 
I hope you'll stop by my intro post on the Just Nick blog and say HI!  I'll be back again tomorrow to share another Just Nick DT page.  See you then!


Thursday, March 26, 2015

One day at a time: A Scrapbook Page

I'm not always the best about including my personal story in our family scrapbooks.  But, I've had a pretty productive year committing myself to a healthier lifestyle, and I knew I needed to document that story and remind myself how far I've come!  A challenge from the Paper Issues online weekend crop, a pile of pretty new scrap supplies and a decent selfie (after getting my hair done) made the perfect recipe for putting together this page.


Supplies used: Crate Paper - patterned paper, diecuts; American Crafts - thickers; Heidi Swapp - chipboard frames and gold label sticker; Simple Stories - chipboard frames; Paper Smooches - roses die; DCWV - gold glitter paper; Basic Grey - wood veneer; Studio Calico - wood veneer; Queen & Co - mini clothespin; Stampin' Up - butterfly punch. Other: vintage buttons, kraft shipping tag, seam binding ribbon, date stamp, machine stitching.
As you can see, I had lots of fun layering all kinds of bits and pieces on my page. But the primary concept of the design came from the desire to include as many of these Heidi Swapp and Simple Stories chipboard frames as I possibly could.  Filling one of the frames with my journaling was a give in!


How about this gold, glittered frame?  I LOVE it!  I even went back and purchased a second package of these frames just to get another one!  It makes a great focal point of the page and a perfect home for my page title.  Add in a little stamping, a pretty punch, some stitching, and wood veneer and it's complete!


Many of the frames are filled with bits and pieces cut from a sheet of the Crate Paper Confetti collection.  I loved this little camera image and knew it needed a special spot on the page.

 
How gorgeous is that rose diecut?  It's a recent purchase from Paper Smooches and I just love how it looks cut out of this DCWV gold glitter cardstock.  Again, it's the perfect accent to bring about a little more sparkle to this page.

 
Are you good about scrapping yourself?  If not, I hope this motivates you to take the challenge and scrap some of your personal story! 
 
Thanks for joining me today!
 

Monday, February 23, 2015

Being your mom: A Scrapbook Page

Happy Monday, friends!  It's a very happy Monday at my house, because my darling children finally returned to school today, after being off for a full week due snow and below zero temperatures. Don't get me wrong, I do cherish all the time I get to spend with my kids as a stay at home mama, and we certainly made some wonderful memories this past week.  But a full week stuck inside the four wall of our home, where the temperatures wouldn't even allow much outdoor play - left us all wanting back to our routine this morning!
 
I've got a scrapbook layout to share with you today that, like the aforementioned scenario, documents the struggle and sacrifice yet outstanding rewards that can be experienced in motherhood.
 
Supplies used: Heidi Swapp - patterned papers; American Crafts - wood buttons, 3D bows, cork hearts, thickers; Crate Paper - chipboard frame, fabric brad; Studio Calico - mini badge, Mister Huey; Tim Holtz - mini paperclip; Other: Silhouette, Veteran Typewriter computer font, hand stitching.
I dipped into an older paper line by Heidi Swapp, called Mixed Company.  One of my favorite papers from this collection was this paper with the continuous grid of circle icons.  In fact, this paper become the starting point for my page.  I knew using the page as is, would create a background that was much to busy for my liking.  To remedy that, I found another subtle gray background from the paper pad and cut and adhered a smaller selection of the circles to my page.  I re-centered my grid, allowing some of the circles to work off the edges of the page and also left several spots blank.  Both of these design decisions create a resting place for the eye and allow for flow and continuity throughout the page.

I had so much fun selecting which circles I would use in my redesigned grid.  In many instances, I tried to tie the selected circles in with my journaling to give the page more meaning and connection.


The circles without journaling were just begging for some embellishment.  I enjoyed digging through my stash to find little bits and pieces that would adorn my page just perfectly.  I seem to use these Crate Paper chipboard frames on just about every page I do lately (have you noticed?!).  I'm not sure what I'm going to do when I run out! LOL!


With so many colors and elements going on throughout the page, I chose to stick with a solid dark gray for my title.  The beginning part of my title is composed of raw chipboard thickers from American Crafts.  I used some Mister Huey's mist to customize them to fit my page.  Since I did not have a matching cardstock to cut the remainder of my title, I simply used my Silhouette to cut the word 'Mom' in white.  A quick misting of the same Mister Huey ties both pieces of the title together and makes them perfectly coordinate!


Thanks for visiting me on the blog today!  Before I go I wanted to mention that I've created an all new instagram account - @jaclynrenchstudio!  I'm still posting at my old account, if you follow me there, but that will mostly be filled with personal stuff and photos of my kids.  My new account will be dedicated to everything crafty - sneaks, my latest projects and what's inspiring me!  You'll definitely want to come visit and follow me there because I'm doing a GIVEAWAY!  Don't miss out on your chance to be entered and hopefully inspired!