Gams

Friday, October 26, 2012

Create Your Own Palette with Bella Blvd


Need a little something to motivate and inspire you on your next little crafty endeavor?  It can't hurt, right?  If your answer is yes (or if you're just simply in the mood for some crafty eye candy), be sure to stop by the Bella Blvd Studio blog today to find out the details on a 'Create Your Own Color Palette" challenge issued by Stephanie, and for a chance to win some beautiful Bella goodies if you participate!

When I finally get my kiddos tucked away into bed for the evening, and sit down at my scrap desk to craft, my creativity is oftentimes zapped.  Can you relate?  Sometimes, it takes just the right thing to spark my creative juices and inspire me to whip something up (versus collapsing onto the couch in a tired heap - which sometimes happens too, of course!).  This week, it was this fun color palette image below, that rescued me from the nighttime couch potato role!  Stephanie challenged some of the Bella Design Team members to create a project (layout, card, etc) based upon this pretty palette.


Hi Girls. Hope you can help me with my Friday Blog Post this week. I'm going to share a Challenge to readers, "Create your Own Palette". I have used the color palette featured in the image here....and am wondering if anyone wants to play along & complete a project (of any sort card/layout/etc.) using this color palette & Bella Blvd. Anyone have any spare time?! If so, let me know in the comments below and be sure to email ME (not Laura) images of your layout(s) by Thursday afternoon! Thanks girlies!


Funny enough, this is almost exact color scheme that I used to decorate my baby girl's nursery, minus the pop of black.  So naturally once I saw it, I knew it would give me a good excuse to put together a little home decor piece for her room, that I've had sitting in my 'creative bank' since before she was born!  Here is the result:


Supplies used: Bella Blvd Kiss Me collection patterned papers: Flutter, True Love; Bella Blvd Baby Boy collection patterned paper: Momma's Boy; Bella Blvd Designer Tape: Piggy Pink Stripe; Bella Blvd Market Buttons: Pink Flowers; Bella Blvd High Five Alphabet: Piggy Punch; Other - IKEA shadow box frame, crochet twine, computer font, machine stitching, cardstock


The frame I used for this piece was one that I purchased at IKEA awhile back.  It is a 10x10 shadow box, with a 9x9" opening for artwork.  I added Designer Tape to the innermost edge of the frame to add some more color and interest.  At the corners, where the tape strips overlapped, I simply mitered the corners with my craft knife to allow them to line up.

I bought that sweet little Martha Stewart elephant punch specifically for this project!  I'm so glad I finally got to use it for it's intended purpose!  By the way, this cute idea is not solely my own.  Back in the day, Ali Edwards created a sweet little framed pieces like this with punched butterflies.  I've seen lots of interpretations of it since then, and knew that an 'elephant version' alongside that endearing phrase, would make for a cute little addition to Emerson's room.

How cute are those little elephants, marching across the frame in a perfect little row, and punched out of so many pretty Bella papers?


And you know me, I can't finish a project without at least one button!  Love these pretty Bella flower shaped ones!


Want to see what it looks like in her room?  For now, I have it nestled against some of our favorite board books on the bottom left of these three shelves.


I'm so glad to have another decorative piece done for baby girl's nursery.  Considering the fact that she's only weeks away from turning one, it might be time to put the finishing touches on decorating her room!

Thanks, as always, for stopping by!

Saturday, October 20, 2012

Star Spangled Sweetie - A Layout Share

Happy Weekend, everyone!  It's a very happy weekend here in the Rench household, as we spent the day with family, noshing on snacks and cheering on our Ohio State Buckeyes to a WIN!  Any other Buckeye fans out there that caught the game?  The one thing I can say about that team, is they sure like to keep thing interesting!  So fun to see them pull off the win, tho!

But let's be honest, you are not here for the 'sports talk' and honestly, that's about as sporty as I get! LOL!  Onto the craftiness...

When I was recently printing and reorganizing some of my digital photos, I ran across this page that I had never shared on the blog.  It is one of my favorite pages, featuring some favorite photos of baby girl in one of my favorite dresses of hers!  This page was also part of my entry for my Pebbles design team application, so that of course, makes it a favorite as well!

Supplies used:  Pebbles Let Freedom Ring collection patterned papers - Abraham Lincoln, Thomas Jefferson and dimensional stickers, Pebbles Hip Hip Hooray You're Invited patterned paper, Dienamics 'label shaped' die, Stampin Up' Studio alpha die, Jillibean Soup kraft tags, Doodlebug Designs alpha sticker letters and glitter, Other: scallop border punch, chipboard stars, sequins, vellum, string, wooden button.

The journaling says it all!  Shopping for girl clothes, after having two boys, has made it all the more fun.  But I'm not sure who's enjoyed it more myself or my mom!  I love the way the journaling looks printed across these three label dies.  In fact, I have another project to share soon where I've mimiced this same technique.  Why mess with a good thing?! ;)


I attempted my version of the confetti craze on this page, as well.  I tucked varying sizes of small punched patterned paper circles and sequins underneath a layer of vellum and the negative cut star shape.  The stitching around the outer edge of the stars is both decorative and useful, since it also creates a barrier to keep the confetti from escaping.

 
I mixed some diecut letters and sticker alphabets for the title.  And of course, sprinkled in a few more stars and sequins to pull the whole page together.

 
Enjoy the rest of your weekend!  I'll be back soon with more to share! :)
 

Wednesday, October 17, 2012

Bella Blvd Mid Show Release *FULL REVEAL*

Are you ready for it? The day is finally here where I get to share with you a full reveal of Bella's new Kiss Me collection!

 
Isn't it great?!!?!  How about a closer look at some of my favorites from this new collection...
 
First is Love Notes, side A:
 
 
and side B:
 
 
And then, there's True Love, side A:
 
 
and side B:
 
 
And I can't leave out, of course, one of my Bella standard favorites, the Borders:


and Cute Cuts:


If you are in LOVE with this sweet mini collection like I am, you'll be happy to know that it will begin shipping to scrapbook retailers on November 1st!  In the meantime, you can visit the Bella blog over the next several days to see some wonderful projects featuring this new collection.  Also, keep your eyes peeled and be sure to enter the giveaway!!!
 
I can't wait to share with you the fun pages I've been putting together with this darling collection! 
 

Tuesday, October 16, 2012

Bella Blvd's Mid Show Release *SNEAK PEEK*

In just one more short (or agonizingly loooong - depending on your perspective!) day, Bella Blvd will reveal it's latest mini-collection: Kiss Me.! Here's just a little sneaky peeky of what's to come:


Are you intrigued?  If you look closely at this image you'll find lots of little clues included in the full collection. I love, love, LOVE the color palette it features, and the fact that it's filled with cute and trendy icons and patterns.  I know you won't be disappointed!

In the meantime, if you missed it, you can check out Stephanie post on the Bella blog which reveals a little bit about how this collection came to be, and what inspired Stephanie along the way!

I hope you'll stop back by tomorrow for the FULL REVEAL! YAY! :)

Monday, October 15, 2012

October Pagemaps

I had the privilege of creating a page based off of one of Becky Fleck's sketches for her October pagemaps blog release, along with some other members of the Pebbles design team.  I LOVED the sketch - the clean lines and 'triangular' embellishment placement were right up my alley! 


I was anxious to break into my stash of the new Seen & Noted collection, as it definitely ranks among my favorites.  I just so happened to have the perfect photo of my darling kiddos to accompany it, and here is the end result...


Supplies used: Pebbles Seen & Noted collection: Happy Thoughts (751310), Memories (751314), Lots of Love (751315), Perfect Day (751316), Checklist (751320), Phrase Cards (747195), Aqua ABC Stickers (732127), Accent and Phrase Stickers (732128), Masking Tape Stickers (732131) American Crafts Coordinating Cardstock: Surf (71508), Other: machine stitching, computer font, Doodlebug Boutique button, embroidery thread, date stamp, Memories ink, Smooch Spritz mist, Tim Holtz tiny attacher.
 
Here is a closer peek at the journaling, highlighting all the things I can count on from these three just about everyday (good, bad and in between!).

 
I made my own little embellishment flower, by layering and die cutting the patterned paper and topping it off with a sewn on button.

 
It's hard to tell in the main photo, but I happened to have just the right color of yellow mist to coordinate with the background paper.  I was a bit afraid to 'commit' to the misting once the page was complete, but since it matches the background pattern so closely, it really provides a much more subtle look and doesn't detract from the layout's overall clean lines.

 
Hop on over to the Pagemaps site to see the rest of the amazing pages and sketches that were revealed for October.  I'm certain you'll be inspired! 
 
Thanks for stopping by!
 

Friday, October 12, 2012

Pebbles Seen & Noted

Have you spotted the new Seen & Noted collection from Pebbles yet?  It is definitely one of my favorite new lines.  What's not to love?  The color scheme is so bright and fun, the patterns are both trendy and cute, and it's got a load of sweet and endearing phrases that work just great alongside photos or as card sentiments.  I mean, c'mon "I like naps and you", what's cuter (or more true?)?!!  If you love this line, then make sure you hop on over to the Pebbles blog, as they've been featuring lots of great projects with it, ALL.WEEK.LONG!

I've already used this collection for several pages (which I will share soon!) and couldn't wait to test it out on some cards, too.  As you can see, this card includes my favorite sentiment, from the whole entire line!  It was originally sized as a 2x3 card, but I trimmed around it to fit onto one of the chipboard word bubble shapes.

Supplies used: Seen & Noted Perfect Day (751316) Seen & Noted Everyday (751318) Seen & Noted Favorites (751319) Seen & Noted Checklist (751320) Seen & Noted Phrase Cards (747195) Seen & Noted Journaling Cards (747194) Seen & Noted Word Bubble Chipboard Shapes (732132) Seen & Noted Accent and Phrase Stickers (732128) Seen & Noted Multicolored Label Phrase Stickers (732133) Sunny Side Dimensional Flowers (747184) Sunny Side Clothespins (747185)
Other: machine stitching, crochet string, adhesive gems.

The Sunnyside clothespin is making an appearance on this card, as well.  I just love the extra pop of dimension they add, and it looks so cute tied with a bit of twine!


More paper covered chipboard word bubbles on this card, set off with a simple heart sticker and gem.  Again, how cute is that sentiment with the 'multiple choice' answer?!  Just as I did with the last card, the text was cut down to fit my card front, from a 2x3 journaling card.


Thanks for stopping by, today!  I hope you have some fun and crafty plans for the weekend.  I am still recovering from a little scrapbook getaway I had last weekend with some of my favorite girlfriends, so I hope to take it easy.  But a weekend spent scrapbooking means I have LOTS to share!  See you soon!

Saturday, October 6, 2012

World Cardmaking Day

Did you know that today is World Cardmaking Day?  We are celebrating over at the Bella Blog with new cards every hour on the hour. There will be loads of inspiration!

I couldn't pass up the chance to participate in this fun crafty day and use some of my new Bella Birthday Boy goodies.  I always find masculine cards to be the hardest to do, but Bella's Birthday Boy line certainly makes it easy!


Removed for Publication
(be back soon!)


It seems I can't get enough of Bella's beautiful Designer Tapes these days. In fact, I can't call a project complete unless I've snuck that lovely tape onto it somewhere! On this masculine birthday card, however, the tape is the 'star' of the show. 

To create these celebratory pom poms that adorn my card, I started by laying down strips of the tape onto scrap white cardstock. I then went back with circle and scallop punches and punched three to four of each shape, from the rows of colorful tape. The matching shapes were then layered together and attached with a sewn on Market Button. To add some more 'party' to my pom poms, I cut small slits in each layer of the punched shapes, all around the perimeter, and used my fingers to fluff and curl them for added dimension. I think the recipient of this card is sure to feel special when they open up this fun and lively greeting!


Thanks for stopping by.  Happy National Cardmaking Day - I hope you find some time to celebrate by crafting up a couple of cards of your own!!! :)

Friday, October 5, 2012

Bella Intro

Today I'm being introduced over on the Bella Blvd blog.  I hope you'll stop over to visit and meet the other two lovely ladies that are being introduced alongside of me!  They are featuring a little bio and two of the four projects I submitted for my design team application.

This first page was my favorite of the four that I submitted.  It could have something to do with that cute cupcake paper, the fun layered title or possibly even that sweet, round, chubby smile.  I'll let you decide...


I love Bella's flags. They are such a cute little embellishment to tuck in here or there and add a little extra something to your page.  In fact, I liked the look so much I created an additional double bannered flag of my own, with a stick pin from my stash and some additional Bella phrase stickers.


This chipboard cupcake really adds a lot of interest and attention to the title.  It was actually from the Baby Boy collection, but I dressed it up and made it 'girly' by adding a baker's twine bow and pink Bella Market Button.

You can see a closer look at the title here too.  I layered lots of Designer Tapes over a few of the letters to add a bit more interest and fun to the page title, and a layered some plain white letter stickers over the rest of the chipboard letters for even more added dimension.


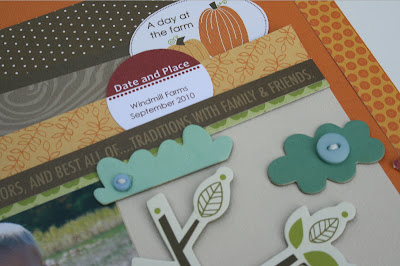
This next two page layout includes some favorite photos from a very memorable trip to the pumpkin patch.


I love all the coordinating chipboard pieces that Bella makes and managed to squeeze quite a few onto this two page spread.  As you'll notice some buttons even snuck their way on top of some of the chipboard pieces, as well!  ;)  You know me and my button LOVE!


Thanks for stopping by today.  I hope you'll hop on over to the Bella blog and say hello, as well!

Wednesday, October 3, 2012

Tricks and Treats

Can you believe that we are already a few days into the month of October?  I'm still trying to wrap my brain around that fact!  It goes without saying though, that this month brings about lots of Halloween hoopla at our house.  As with many of the major holidays, we like to use this time of year as an excuse to whip up some yummy treats and gift them to friends, neighbors, teachers, classmates, etc.  It's a great opportunity to bake up some of our favorite holiday goodies and let those around us feel special with a simple little gift.  (Not too mention the fact that my jeans and scale are thankful that these treats do not sit long at our house!!!).

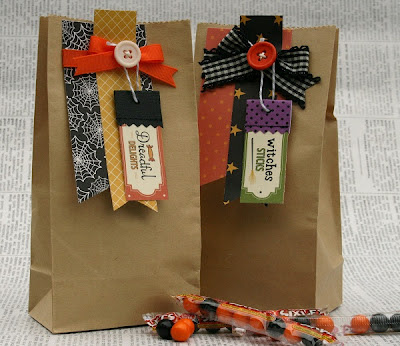
You can't give away a yummy treat without some cute packaging though, now can you?  I don't think so!  Which is why I broke into some of Pebbles new, adorable Tricks and Treats collection to put together these ghoulishly cute tags!


Supplies used: Tricks and Treats (751337) Tricks and Treats (751329)  Tricks and Treats (751334) Tricks and Treats (751338) American Crafts Coordinating Cardstock - black (71082) Other: Doodlebug Doodletwine (gray),  American Crafts buttons, machine stitching, buttons, tiny attacher.
I dug into the 6x6 paper pad first, as the small scale design of these papers was just perfect for the size of my banner style tags.  I love all of the sentiments on the label-type paper ('gooey globs', 'spookey treats', 'toe of frog') and thought they would be a festive little addition.  I cut them out, stitched up a little topper to adorn them and threaded them on some baker's twine to dangle from each button.  I love the whimsy that they add!

Here's a look at the tags 'in action'.  I've simple stapled them onto small craft bags that I found at my local craft store, and they are ready to give.


Head on over to the Pebbles blog to the 'Whip It Up Wednesday' post featuring my tags and another fun project!

Thanks for stopping by!  I have lots to share in the coming days, so I hope you'll be back to visit soon!