Gams

Tuesday, December 16, 2014

Two page Tuesday #4

I'm taking a break from the holiday projects today, to share with you a fall themed page, for this round of two-page Tuesday.
 
A favorite activity in our household each fall is raking up the backyard leaves into a giant pile fit for jumping in.  Of course, I can't let the memory pass without snapping a few photos of this beloved tradition and the smiles it brings to my kiddos faces. 
 
This post shows a page I did to record this event last year.  This time around I went with a more neutral cardstock base, accenting the two page spread with some collage type elements.


Supplies used: Cathy Zielske - 3x4 printable (from Scrapbook and Cards Today Fall 2014 issue); Pebbles - patterned paper; American Crafts - patterned paper (yellow/white stripe); Studio Calico - wood veneer heart; Crate Paper - wood frame; Maya Road - kraft envelope; Bazzill Basics - cardstock; Doodlebug Design - enamel dots; Kerri Bradford - cut file title; Other - machine stitching. computer font, silhouette.
The majority of my design is focused toward the middle portion of each page.  Because of this I thought the left and right-most edges of my spread needed a little something to frame out the design.  Trimming a 2" section of the width of each of the background cardstock pieces and filling that space back in with some more neutral patterned papers, does the trick.


The journaling is always a key piece in my pages.  I have a tendency to be a bit wordy at times, so finding just the right spot to fit my text and not overwhelm my photos can be a bit tricky.  I found this awesome wooden oval-shaped frame from Crate Paper in my stash.  The wood tones were a great match for the outdoorsy nature of the page and the center of the frame left a good surface area to include my journaling.  I accented the frame with a few layered leaves, cut with my silhouette, a wood veneer heart and a sprinkling of enamel dots.


The 3x4 card that sits just above my journaling, serves as the title for my page.  This 3x4 card, along with the coordinating one I've used on the right page, are printables from Cathy Zielske.  I love the clean and graphic feel to these cards, which is very typical of her style, yet they still mesh nicely with a more collage-y design.

 
The second page of my spread is almost a mirror image of the first.  The photo placement is again concentrated in the center of the page, with the collage elements framing out the ends of the photo arrangement.
 
 
I carried more of the diecut leaves over on to page two, mixing them among a kraft envelope, additional printable and diecut title.  Some machine stitching, to secure the pieces, and a sprinkling of embellishments completes and enhances the layers.  I love how all of these pieces overlap and layer together to mimic the look of a freshly raked leaf pile.


Thanks for joining me for another installment of two page Tuesday.  See you soon!

Monday, December 15, 2014

Quick and pretty holiday gift bags

Hello!  Good Monday morning! I'm popping in real quick to share some quick and pretty holiday gift packaging that I whipped up for the LMT blog.  With only ten days remaining until Christmas, I'm sure we're all in need of some simple gift wrap ideas, am I right?! 


Supplies used: Die Cuts with a View Candy Cane Lane Stack; Love My Tapes black glitter paper and red & white striped washi tape; American Crafts red twine; Jenni Bowlin red adhesive pearls; Michaels glittery red ribbon.
A kraft colored bag or container is always a good starting point, for a project like this.  Using a neutral base, allows you to work in just about any color palette you might have on hand.  I purchased my kraft gift bags at my local dollar store - 4 for $1.00! 
 
For the two bags I'm showcasing today, I used the Candy Cane lane stack from Die Cuts with a View.  It features a bold combination of red, black and white alongside some graphic yet elegant images.
 
 
Both bags have a wide glitter banner, cut from the Love My Tapes adhesive glitter sheets, as a backdrop.  The banner is not only pretty, but creates a nice focal point for the greeting tag.


The tags were cut from the Candy Cane Lane papers and simply embellished with a strip or two of washi tape and some pretty adhesive pearls.  The back of the tags are blank to write my 'to and from' message, and  are finished off with a tie of sparkly ribbon and some matching twine.


The best part about this project is that, once my supplies were gathered, I put together these two bags (present inside and tags addressed) in under ten minutes!
 
I hope this gives you some hints for completing your holiday wrapping!  Thanks for stopping by!
 

Friday, December 12, 2014

DCWV and Faber Castell Blog Hop

Good morning crafty friends!  Have you been following along on the DCWV and Faber-Castell Design Memory Craft® Winter blog hop all this week?  If not, you're in for a real treat and have a lot of catching up to do! Starting this past Monday, December 8th, both companies have been sharing beautiful winter and holiday themed projects created by designers from both companies! 

As a brand new designer for DCWV, I'm excited to share that today my mini album is being featured on the DCWV blog.  I created a 'two in one' project.  At first glance you'll see a darling little mini album.


DCWV and Faber Castell supplies used on this project include:
DCWV - Christmas & Winter Cardstock Stack; Candy Cane Lane Stack; Premium Paper Collection Stack; Winter in the Woods 6x6 Stack; Self Adhesive Heart Mirrors
 
*Other supplies: Studio Calico wood veener stars; Hero Arts embossing powder; Simon Says Stamp/Kelly Purkey stamps; Crate Paper chipboard frame; American Crafts twine; Stampin Up punches; Michaels - ribbon and holiday berry sprig.
 
However, once that album is removed from the clipboard, you're left with an additional home décor piece. The clipboard is not only decorative, but also functional.  I've covered it's surface with Faber Castell's black Chalk Board Paint, making it ready to leave holiday messages for loved ones or perhaps even to use to countdown the days until Christmas.

To give the surface of the clipboard even more of a chalkboard feel - I rubbed white ink, using my fingertips, over various spots of the surface area.  Doing so, achieves a more permanent 'chalk dust' look.


The chalkboard surface wouldn't be complete without some pretty embellishment.  A few simple diecut snowflakes become show stopping embellishments when covered with Faber Castell's Glass Bead Glitter Gel.  This close up, captures a bit of the texture and dimension that the glitter gel provides, simply by painting it over a smooth cardstock surface.


I wanted to continue the chalkboard look throughout the album, and knew it would mix well with pieces from DCWV's Candy Cane Lane, which features lots of red and black.  Again I painted a small square of the Chalk Board Paint on the cover of my album.  A chipboard slide, frames up the chalkboard paint and covers up the messy painted edges.  I stamped, embossed and stamped my sentiment again, offsetting it a bit, to make it appear more chalk-like.  The diecut snowflake is again covered in more of the Glass Bead Glitter Gel.

 
You'll see as we move through the albums pages, that I brought in a bit of green among the pages.  I wanted a subtle appearance of that color on the cover.  I was able to achieve that by rubbing the edges of the black and white diagonal stripe paper with the Green Tea Gelato, and rubbing it in with my finger to blend and smooth it.


The next several pages feature a variety of patterns and pieces from the DCWV stacks listed above.  I love having the pages cut different sizes, dimensions and shapes to add interest and fun to the album.


A strip of red glitter paper from the Christmas & Winter Wishes cardstock stack is the perfect pop of red along the bottom edge of this kraft note card.  The kraft piece lifts to reveal more surface area for pictures and/or journaling.  I bet you are wondering about that sweet little heart too, huh?  It's an adhesive mirror from DCWV!


This chalkboard tag was cut from one of the patterned papers in the Candy Cane Lane stack.  To personalize it, I added a bit of stamping, embossing and a length of twine.  It's attached to the vellum page with a simple staple.
 

More of the DCWV glitter paper, cut with a scalloped border punch, will create a pretty backdrop for a special photo, on this page.


I couldn't help but fussy cut a few of the pretty poinsettias from the Candy Cane Lane stack for some added embellishment.


I plan to gift this album filled with pictures and memories of Christmas past, to someone special this year. 
 
I hope you'll check out each day's post on both blogs for chances to win lots of fabulous prizes!  See you on Monday with a quick and easy gift wrap idea! 


Monday, December 8, 2014

Glittery Countdown to Christmas

Hello!  Are you in the midst of the holiday hustle and bustle?  It seems like the days speed up exponentially once the month of December is upon us.  I have lots of crafting and making I'd still like to do for the holidays, so I'm hoping I can squeeze a few more projects in before December 25th!  If that's going to happen, I'm going to have to make said projects both quick and easy.  But that doesn't mean they have to be short on style or cuteness!

Here is a project I shared on the Love My Tapes blog on Friday that fits the bill:


Pop on over there to see how I quickly and beautifully dressed up our Christmas book advent countdown this year!

Monday, December 1, 2014

A couple of CUTE pages

Good Monday morning!  I know Monday is not everyone's favorite day, so I thought I'd start off the week sharing something CUTE.  Can't hurt, right?!

I've been digging through some older photos as of late to try and jump start my creativity.  The busyness of this time of year, always seems to zap my mojo a bit.  I thought giving myself some new 'old' material might inspire me in a different way and so far, so good! 

This first page features pictures of my oldest son when he was just about to turn four.  He's now nine - where does the time go? Waaaaahhhh!


Easy to see where the cute factor comes in, isn't it?!?  It's everything Doodlebug, of course!  Speaking of digging out the old to use as new, again - that's just what I've done with this Doodlebug collection.  I've had it in my stash for many years, and used it on several projects.  It's just so CUTE though, I couldn't resist revisiting it.  The colors and feel of this line were a perfect match to these favorite photos of my sweet little guy! 


Supplies used: Doodlebug Design - cardstock, patterned paper, sprinkles (enamel dots), pearls, sequins, mini clothes pin, button, stickers, tag; Crate Paper - chipboard frame; Simple Stories - sticker labelAmerican Crafts - twine; Target - chipboard letters; Photography - Michelle Enebo Photo; Other: Veteran Typewriter font, foam adhesive, machine stitching.
I had fun digging through my stash of Doodlebug paper scraps to piece together these patchwork squares.  A little bit of stitching and strategic embellishing, finished them off quite nicely!


I even dug into my stash of old, old chipboard alphas (these are from the Target dollar spot, of all places) to help spell out my son's initials for the title.  I simply coved them with coordinating Doodlebug paper and dressed them up with some stickers and enamel dots, to ensure the title fit seamlessly onto the page.

 
I did the same with this ampersand, nestling it on top of the Crate paper chipboard frame and alongside my journaling.  More stickers, a twine tied button and some sequins make the perfect little accents.


Don't worry the CUTE doesn't stop there,;I have one more page to share!  It's another layout documenting some memories and pictures from two summers ago and more cute Doodlebug paper, of course!

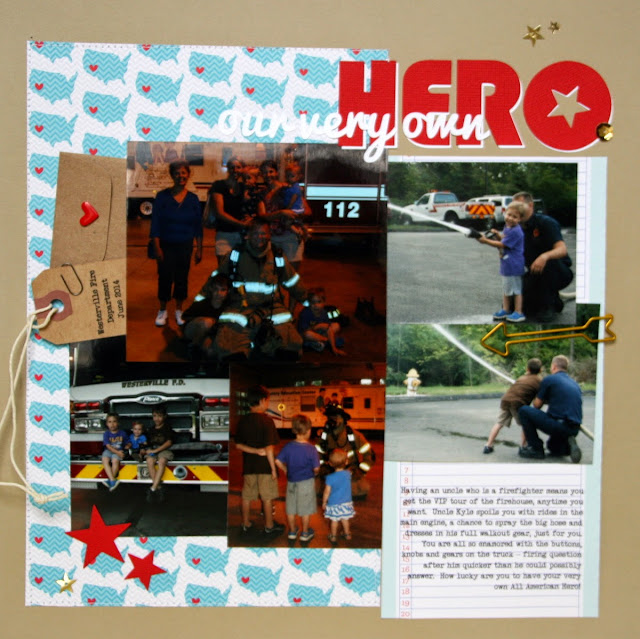
My brother-in-law is a fireman, so my kids are always treated to the VIP tour of the firehouse on our trips up north.  This sweet USA print from Doodlebug worked great to pair with these pictures of their very own hero!


Supplies used: Doodelbug Designs - patterned papers, sequins; Jillibean Soup - shipping tag, kraft coin envelope; Freckled Fawn - arrow clip; American Crafts - cardstock, star sequins; Other: Silhouette Portrait, Veteran Typewriter font, star punch, machine stitching.
While this page remains fairly simple I added a few fun pieces, like this arrow clip from Freckled Fawn, to jazz it up a bit.


If your couldn't tell from some of my recent posts, I have a slight addiction to cutting out custom titles on my Silhouette.  I love that I can adjust the size and the font to perfectly suit my project.  Throw in a few sparkly sequins and the page is complete!

 
Thanks for stopping by!  Hope your Monday allows for some crafty time!
 

Sunday, November 30, 2014

Catching up with Love My Tapes

Happy Sunday friends!  I hope you all enjoyed a nice weekend, and for my American friends, I hope your Thanksgiving was filled with family, good food and abundant blessings.

I wanted to pop on real quick tonight to share a couple of projects I had up on the Love My Tapes blog recently.  The first one is a page to match the season.  While these pictures are technically from last winter, the recent snow we've had and my stack of cozy, swater-like fabric tapes had me itching to scrap this memory!


Supplies used: American Crafts - patterned paper, cardstock, heart punch; Jillibean Soup - background patterned paper, Love diecut word; EK Success - Martha Stewart snowflake punch; Doodlebug Design - sequins; Love My Tapes - blue fabric tape; Other - machine stitching, Veteran Typewriter computer font; Silhouette portrait.

Here's a closer look at the blue fabric tape.  It does a great job of drawing your eye to the title and framing it out on both ends.  The texture and pattern remind me of a warm, cozy sweater so that also made it a perfect match for this page!


To get more details on this page, hop on over to the this post on the LMT blog.

My next project was created with my Thanksgiving hostess in mind, but really you could send a card like this anytime of the year!  Switch up the colors and icon and it could work for just about any season.  Here's a look...


Supplies used: LMT- ivory lace tape; Bazzill - cardstock; Stampin Up - embossing folder; Doodlebug Designs - sequins; Hero Arts - ink, leaf stamp; Jillibean Soup - stamped sentiment; American Crafts - twine; Other: foam adhesive.

This particular project features LMT's pretty lace tape.  For more info and a closer look, check out this post on the LMT blog.

That's it for today!  Join me back here tomorrow and I have two cute pages to share.  See you then!

Tuesday, October 28, 2014

Two Page Tuesday #3

Hi readers!  Welcome to another installment of Two-page Tuesday.  I'm calling this one version 3.0. 

I just spent the weekend with some of my favorite girlfriends - chatting, eating, laughing and scrapping!  While I wasn't nearly as productive as I've been in year's past, I still have a small pile of pages that I'm excited to share here on the blog in the coming weeks.

This is the first of those pages.  I bought that darling black and white Doodlebug graduation paper because I knew it would be just perfect for documenting my youngest son's preschool commencement.


Supplies used: Doodlebug patterned paper and sequins; Bazzill Cardstock - navy, We R Memory Keepers cardstock - gray; Jillibean Soup polaroid placemat; Love My Tapes black glitter adhesive sheet and black & white polka dot washi tape; Echo Park star die; Simple Stories label sticker; Memories black ink; Other: Silhouette, foam adhesive, computer journaling.

I had seven pictures to include on this two page spread.  In order to fit them all in and still have room for lots of other fun details and important info, I sized the pictures down considerably.  Using Picasa (which you can download for free right here), I put 2 pictures on each 4x6 canvas resulting in a series of 2x3 photos.  With the pictures scaled down, they fit just perfectly within the margins of the Jillibean Soup polaroid placemat paper.


Many of the placemats include cute words and icons that are already diecut into the page.  I simply backed each of those spaces with a coordinating grey cardstock to make them fit in with the rest of the design.


I also reached into my Love My Tapes stash for this page.  In fact, you can view this page on the Love my Tapes blog today. 

I used the black and white mini polka dot tape to give the illusion that several of the polaroids were taped to the page.  I also used LMT's 12x12 glitter adhesive-back sheets to cut a series of diecut stars to accent my page.


Sprinkling the stars by my title and even carrying them to the left page, creates a nice 'frame' on both ends of the layout.  It also draws the readers eye fully across the two pages.

 
Putting together a two page layout doesn't have to be difficult.  Here I've lined everything up very formally and linear.  The addition of cute details, diecut stars, sequins and even a bold title spices up the page and makes it interesting.
 
Thanks for visiting today! 

Thursday, October 16, 2014

Spooky cute neighbor treats

As promised, I'm back today to share with you a recent project I had up on the Love My Tapes blog.

It's no secret that I love to bake (almost as much as I love to papercraft!).  But if I kept and consumed all of the yummy treats I whip up, I most certainly would not be able to fit in the clothes in my closet - ha!  So, to share the wealth with my friends and neighbors, and spare my waistline - I love to package up these treats to gift to some of my favorite people.

The cooler temperatures have had me in the mood for pumpkin EVERYTHING.  As of today, I've officially baked six loaves of pumpkin bread.  I found these sweet kraft and orange polka dot boxes at Hobby Lobby, to put all that yummy bread in. They were rather plain on their own, but a bit of washi tape, glitter paper, and a festive sticker or two made for quite a spooky yet sweet presentation.


Supplies used: Hobby Lobby - kraft boxes; We R Memory Keepers - black cardstock; Love My Tapes - black polka dot washi tape, triangle washi tape, self adhesive black glitter paper; Recollections - 3D stickers; Stampin Up - sentiment stamp; Jillibean Soup - kraft tags; Memories - black ink.
 
I started by cutting a black cardstock band, approximately 2.5" wide, to fit around the width of each box.  The cardstock band is wrapped with a few layers of washi tape and self adhesive glitter paper.  In order to create a coordinating bow, I layed and trimmed out strips of washi tape, onto white cardstock.  Doing this, allowed me to treat the tape as ribbon, and construct a pretty layered and dimensional bow.  A simple tag adorned with a cute 3D sticker, stamped sentiment and another strip of the self adhesive glitter paper finishes off this sweet piece.
 
 
To coordinate with the ghost sticker on this next box, I went with a different washi tape.  I just received this tape in my latest LMT design team box and it is one of my very favorites - love the triangles!  And how cute is that Stampin' Up sentiment - "It's Halloween - enjoy every bite."?!!  It couldn't have been more perfect, huh?!


My ideas for pretty packaging don't stop there.  I featured a similar project on the LMT blog here.  These pillowboxes are perfect for a small little treat or even a gift card.  They can be decorated to suit the occasion and are quick and simple to put together.


I hope I've inspired you to pull out your papercrafting supplies the next time you are gifting some goodies - homemade or store-bought!  Thanks for joining me again today! 

Wednesday, October 15, 2014

It's almost Halloween!

Good afternoon, crafters!  As you all know, we're midway through the month of October, which means that Halloween and all of the associated festivities are near or underway.  I, for once, feel somewhat prepared for the upcoming holiday.  One child's costume is purchased, another I'm in the process of DIYing, and the oldest - well, he'll probably throw something on at the last minute, anyway!?!

In the spirit of not being behind, I thought I'd share a couple of costumed adorned pages with you today!

This first one was fun to put together!  I loved strategically filling the negative circles of the graph lined paper with multiple patterned papers, stamped images, buttons, sequins, stickers, etc.  While there is a lot of color and embellishment on this page - the wide black cardstock border creates a nice frame for the page and resting place for the eye.


Supplies used: Bella Blvd - patterned paper, decorative tape, stickers, buttons; Doodlebug Designs - enamel dots, 3D sticker; American Crafts - cardstock, sequins; Pebbles - letter stickers; Studio Calico - stamp; Stampin Up - ink.
For the next page, you can see that I took inspiration for the placement of my photos and patterned papers, from the many project life style 3x4" designs on the market.  I layed my photos and patterns out in a simple grid design, spacing the two rows apart to leave room for my title.  How cute are they 'eyes' in the word spooky?!  To create them I simply punched 1" circle from white cardstock and adorned each one with a black sequin.  Simple, fun and totally cute!

Supplies used: Bella Blvd - patterned paper, decorative tape, stickers; Doodlebug Designs - enamel dots, gems, buttons; American Crafts - cardstock, sequins; Fiskars - circle punch; Stampin Up - border punch; Other - font, veteran typewriter (journaling), marmalletta & bebas nue (title).

Thanks for joining me today!  I'll be back tomorrow to continue the Halloween fun!  I've got some spooky little gift box ideas to  help you package up festive Halloween treats for friends and neighbors!
 
See you then!


Thursday, September 25, 2014

Guest Designer: Basic Grey

I was thrilled to recently receive an email inviting me to be a guest designer for Basic Grey.  Ummmmm, you want me to create with my choice of your beautiful paper collections AND you'll feature my work on your blog?!  YES, please, sign me up!

If you follow me on instagram, you might have guessed from the sneak peeks I've been sharing, that I've been keeping this little secret.   Todays' the day I get to share all of the projects I have been working on in their entirety!  I used a mix of Basic Grey's Second City collection by Kelly Purkey and the Capture collection.

Second City has many travel themed icons and phrases, which are great for documenting your trips and/or vacations.  I wanted to use this collection in a bit of a different way on my first page, though.  All of the purples in the collection, reminded me of some photos I had not yet scrapped of my daughter when she was just learning to cruise and walk.   The travel themed phrases 'let's go', 'take the scenic route' '& adventure' worked just perfect to document this milestone. 


Supplies used: Basic Grey Capture & Second City - patterned paper, stickers, diecuts, flair, 3x4 cards, chipboard; Other: veteran typewriter font, foam adhesive, twine.
I loved that I could combine pieces of Second City so easily with the Capture collection. I might not have paired these two initially, but they share some common colors that really allow them to coordinate well.
 
 
Sizing my photos down to 2x3" and arranging everything into a 3 x 3 grid allowed the design to stay cohesive.  I was able to include four pictures, plenty of journaling and lots of different layers and textures.  Take for instance this title piece - I used multiple stickers, diecuts, chipboard, stitching and twine all layered together.  If I had done this type of layering all throughout the page, it would be chaotic.  Focusing the textures and layers among select pieces of the grid, instead, allows for movement through the page, and still keeps the focus on the pictures.


For the second of the two layouts I completed, I couldn't help but to go pretty literal in theme and memory. I used Second City to document a fun memory from a girl's trip my mom, sister and I took, this past summer.
 
Once again, I was drawn to the purple in this collection, which surprisingly is actually is a color I never reach for!  I love how it provides a somewhat 'neutral' background for all of the added details and layers happening on this page.
 
Supplies used: Basic Grey Second City - patterned paper, transparent & paper diecuts, wood embellishments, letter stickers, flair; American Crafts - twine; We R Memory Keepers - cardstock; Silhouette - Vegas script title; Other: Bebas Nue font (title), Veteran Typewriter font (journaling); machine stitching.
Aren't those feathers great?  I mixed a diecut paper, transparent and sticker feather to create a cluster alongside my photo.  The '3' circle diecut couldn't have been more perfect to represent a picture of the three of us.
 

Lots more strategically placed diecuts and stitching work together to frame the photo.  I loved the wood veneer pieces that accompanied this collection.  Boy are they sticky, too!  There will be no worries of coming back to this page in the future, and wondering whether or not the heavier embellishments have stayed in place!


To create the title I used a combination of letters cut from my silhouette along with the great tiny letter stickers included in the collection.  That orange ombre paper was too fun not to use for the title!


These two collections make for some pretty fun cards, too!  Again, I went for it with a cluster and mix of feathers behind my sentiment.  To continue to carry the color throughout the card design, I used the transparent triangle pieces to carry the eye from the top of the card to the bottom.


I knew this cityscape image would be the perfect compliment to a 'missing you' greeting.  The alphabets included in each collection are a great size for cards.  Since they are small enough to work on a card, they allowed me to customize my sentiment just perfectly!


Thanks for stopping by and sharing in my excitement today!  I hope you'll swing on over to the Basic Grey blog also, to get another look at my featured projects and read my answers to the 'baker's dozen' questions.  If you do, make sure you comment and say HI!